Practical 9
Last update: February 15th, 2026
Objectives
The learning objectives for this practical are:
- Create HTML documents.
- Publish your website with GitHub Pages.
- Create Markdown documents.
Setup and background
To do this practical you only need text editor an a web browser. Make
a new directory called practical9 and store there the files
generated during this practical.
HTML documents
The basic skeleton for an HTML document consists of:
A DOCTYPE element that tells the web browser this is an HTML document:
<!DOCTYPE html>A head element, which contains metadata, enclosed in other HTML elements, about the whole document such as a title that is displayed in the browser tab displaying the HTML document. Another common metadata to be included here is the one associated with the
<style>element.<head> <title>Page Title</title> </head>A body element with the main content of the HTML document, which in this case consists of a heading and a paragraph.
<body> <h1>This is a first-level heading</h1> <p>This is a paragraph.</p> </body>
The elements in parts 2 and 3 of the skeleton are enclosed by
starting <html> and ending </html>
elements. The whole skeleton together looks as follows:
<!DOCTYPE html>
<html>
<head>
  <title>Page Title</title>
</head>
<body>
  <h1>This is a first-level heading</h1>

  <p>This is a paragraph.</p>
</body>
</html>Using a text editor, copy and paste the previous code into a text
file called index.html, and open it with the web browser
(File -> Open File ...).
The basic HTML elements are:
A text headings:
<h1>,<h2>, …,<h5>,<h6>.A paragraph:
<p>.An unordered (bulleted) list:
<ul>and<li>.An ordered list:
<ol>and<li>.A hyperlink:
<a>with thehrefattribute specifying the linked file or URL.An image:
<img>with thesrcattribute specifying the path to the image file.A single line break:
<br>.An horizontal ruler:
<hr>.
Exercise: Using some of these elements, edit the
file index.html and modify it to make a web page about your
favorite (or unbeloved) music band. The page should include two
sections, one with the origins of the band and its members, and another
with its discography (shorten it to the most relevant one if it is too
long). Add a picture of the band and a link to their official web page
(if they don’t have one, then link to some other website that talks
about them). Try to keep it under 30 lines. To display in the web
browser the changes you make you need to (1) save the file in your text
editor and (2) press the reload button in the tab from web browser where
you loaded the page.
Styling with CSS
You can alter the style of HTML elements using so-called CSS declarations. There are
different ways to include them, one of them is through the
<style> element in the <head>
section of the HTML document. For instance, edit your
index.html file and add the following CSS declaration
within the <head> section:
<style>
h1 {
  font-family: arial;
}
</style>
Now reload the page and you should see how the text associated with
the first-level heading <h1> elements has changed its
font. Consult the following link and change in
the file index.html the default black color of the
first-level heading <h1> element into another
one.
Publish your website with GitHub Pages
GitHub offers a free web hosting service called GitHub Pages with some restrictions and usage limits such as a maximum disk usage of 1 Gb. While those limits may be too tight for websites with high-resolution images and videos, they are large enough for text content with low resolution images and graphics, such as those produced in the context of data analysis projects.
Here we are going to learn how to publish a website with GitHub pages, but using a private repo created through an assignment from GitHub Classroom, which will make the website only visible after logging into GitHub with our credentials. Please follow these three steps to create the GitHub repo that we will use to publish your website:
- Log into your GitHub account.
- Go to the Moodle site of FCB and click on the link called
Practical 9 Website GitHub Classroom assignment link and accept
the assignment. This will create a private repo with an URL of the form
https://github.com/FBC-XXXX/my-website-YYYYwhereXXXXis the year edition of the FCB course andYYYYis your GitHub username. - Clone this GitHub repo on your local disk. This step will create a
directory called
my-website-YYYYwhereYYYYis your GitHub username. Enter in this directory with the Unixcdcommand.
Now let’s put the website content in the right place of our repo, as follows:
- Within the directory of your
my-website-YYYYrepo, create another directory calleddocs. - Copy in this directory called
docsthe fileindex.htmlyou created before and any associated image files. - From the root of your
my-website-YYYYrepo, stage, commit and push these changes to the remote GiHub repo.
GitHub will look up the contents of your website from a so-called publishing
source which can be either the root of your repo or a directory
called docs in any branch including the default
main branch. In certain settings, the publishing source is
the root of a branch called gh-pages. In this practical, we
will set as publishing source the docs directory of the
main branch as follows.
Click on the
Settingstab of your repo.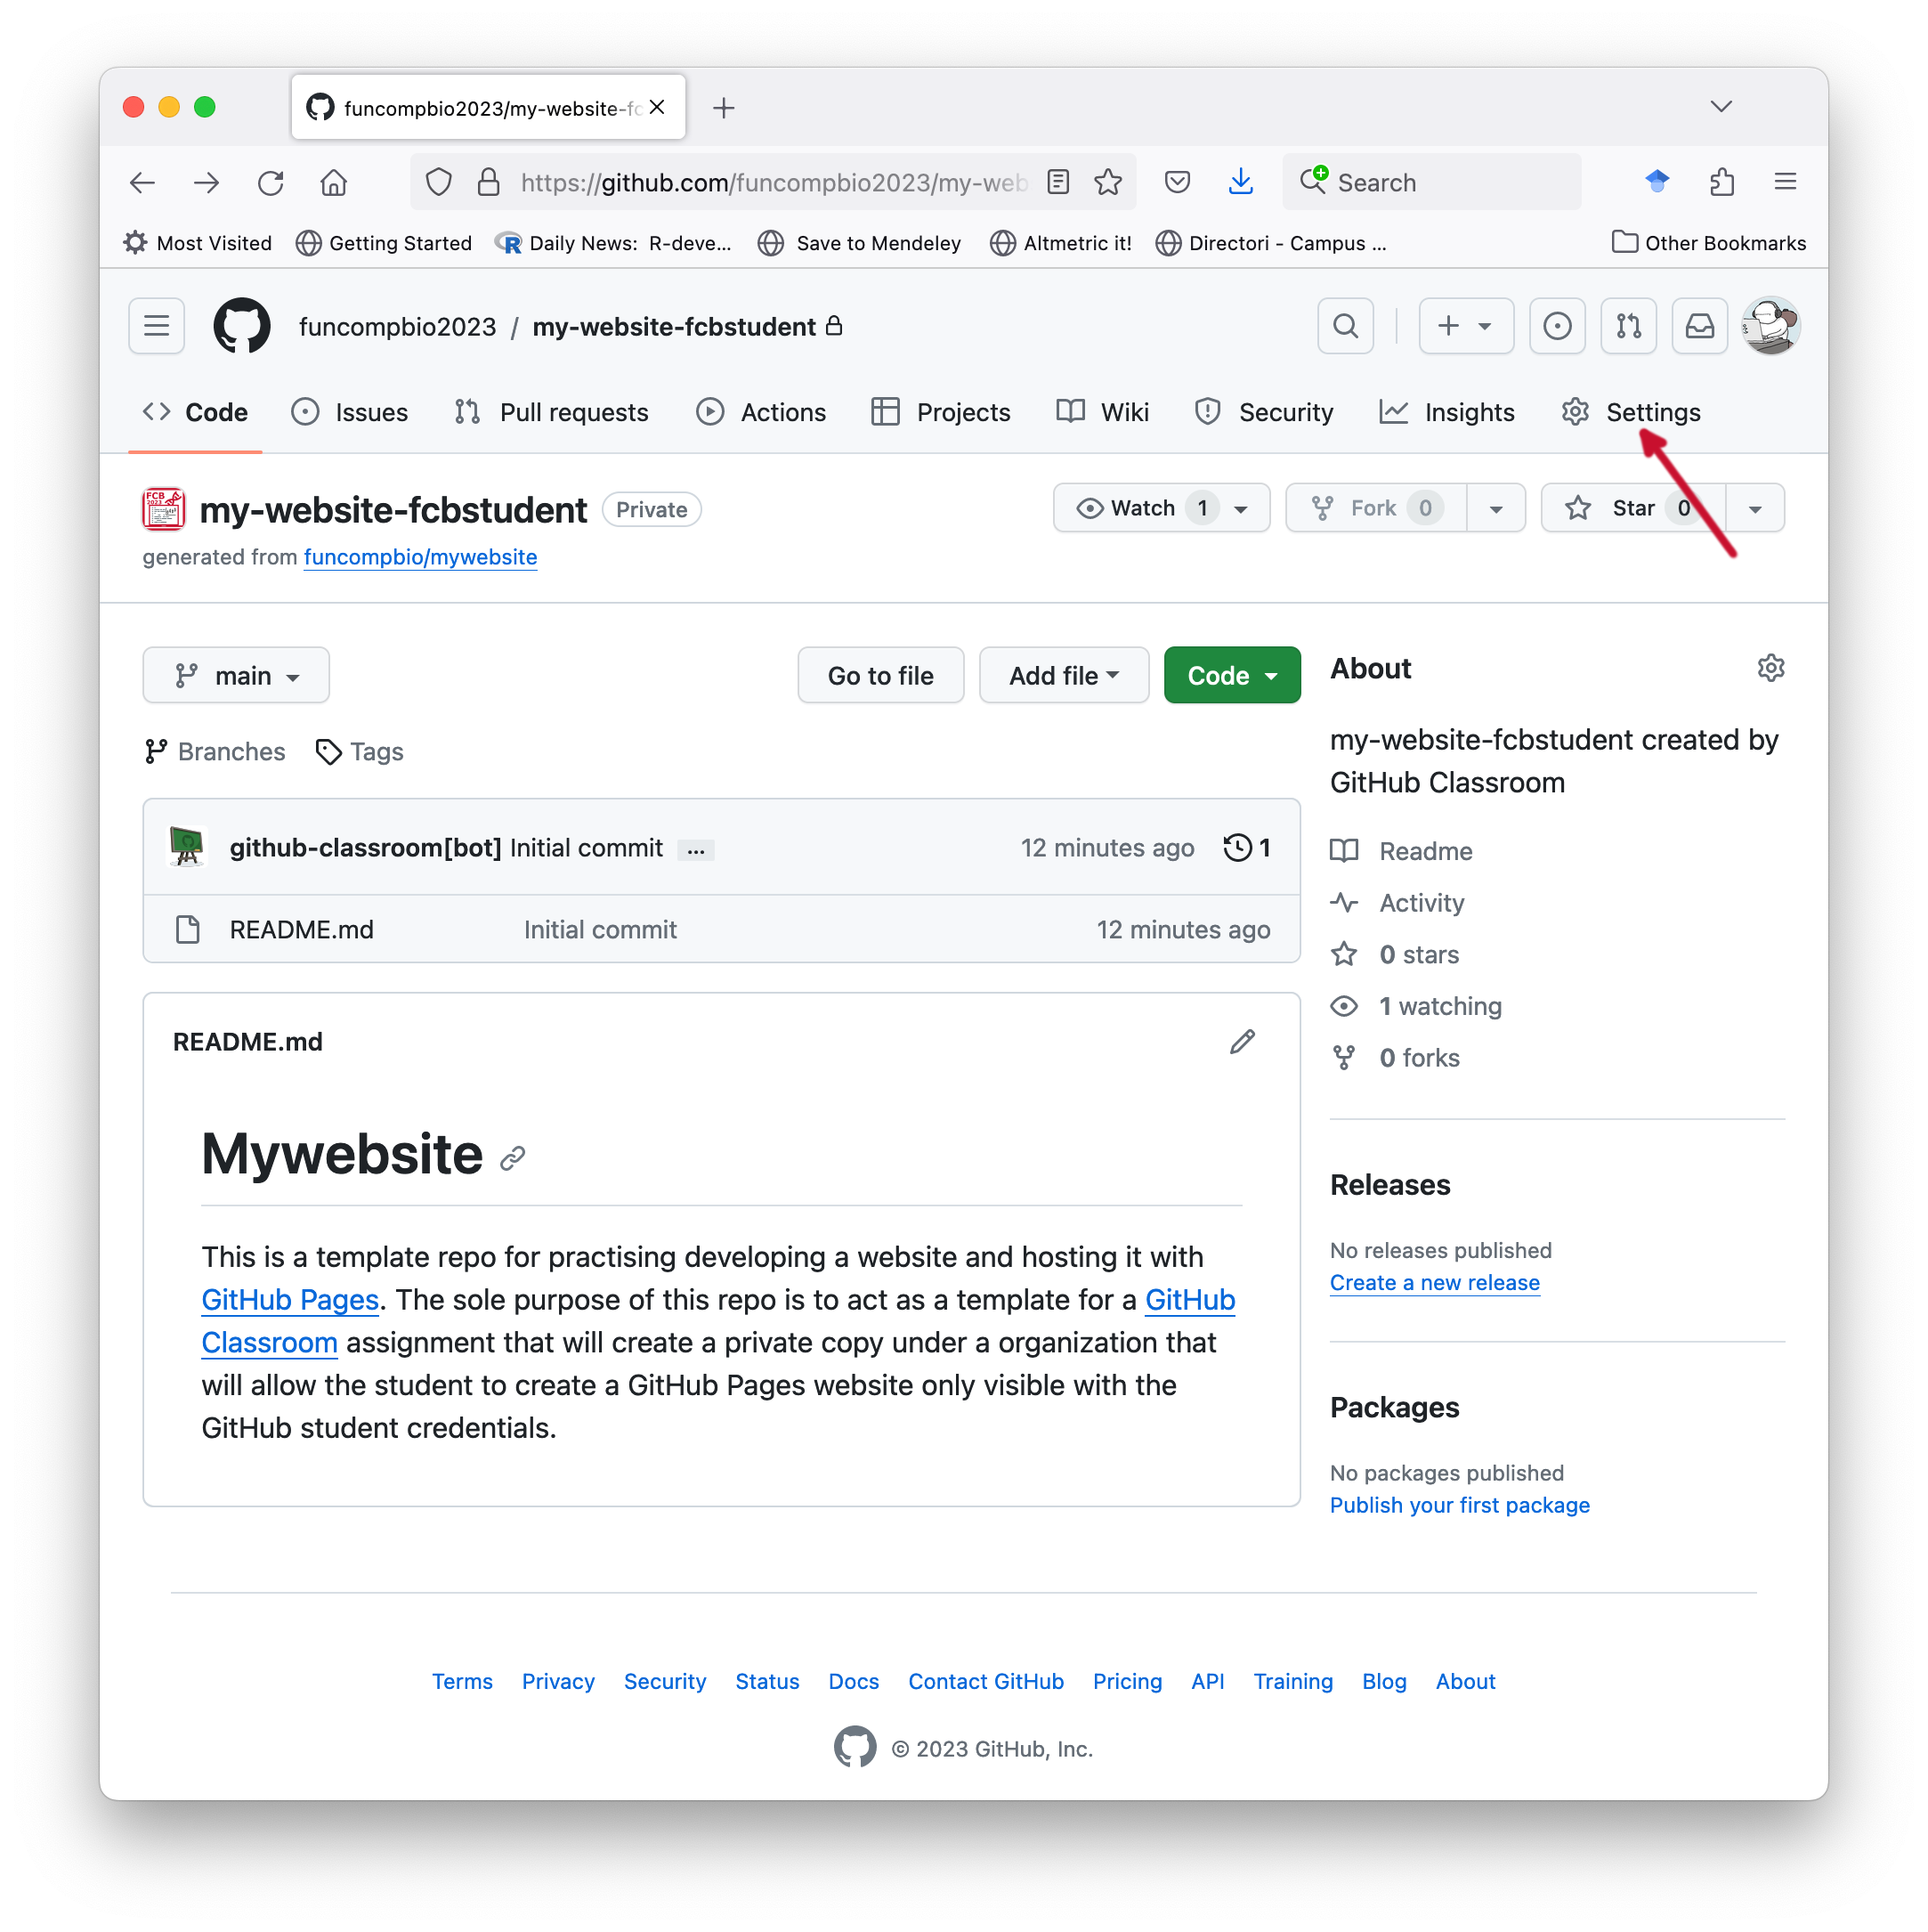
Click on the
Pagesmenu option on the left panel under Code and automation.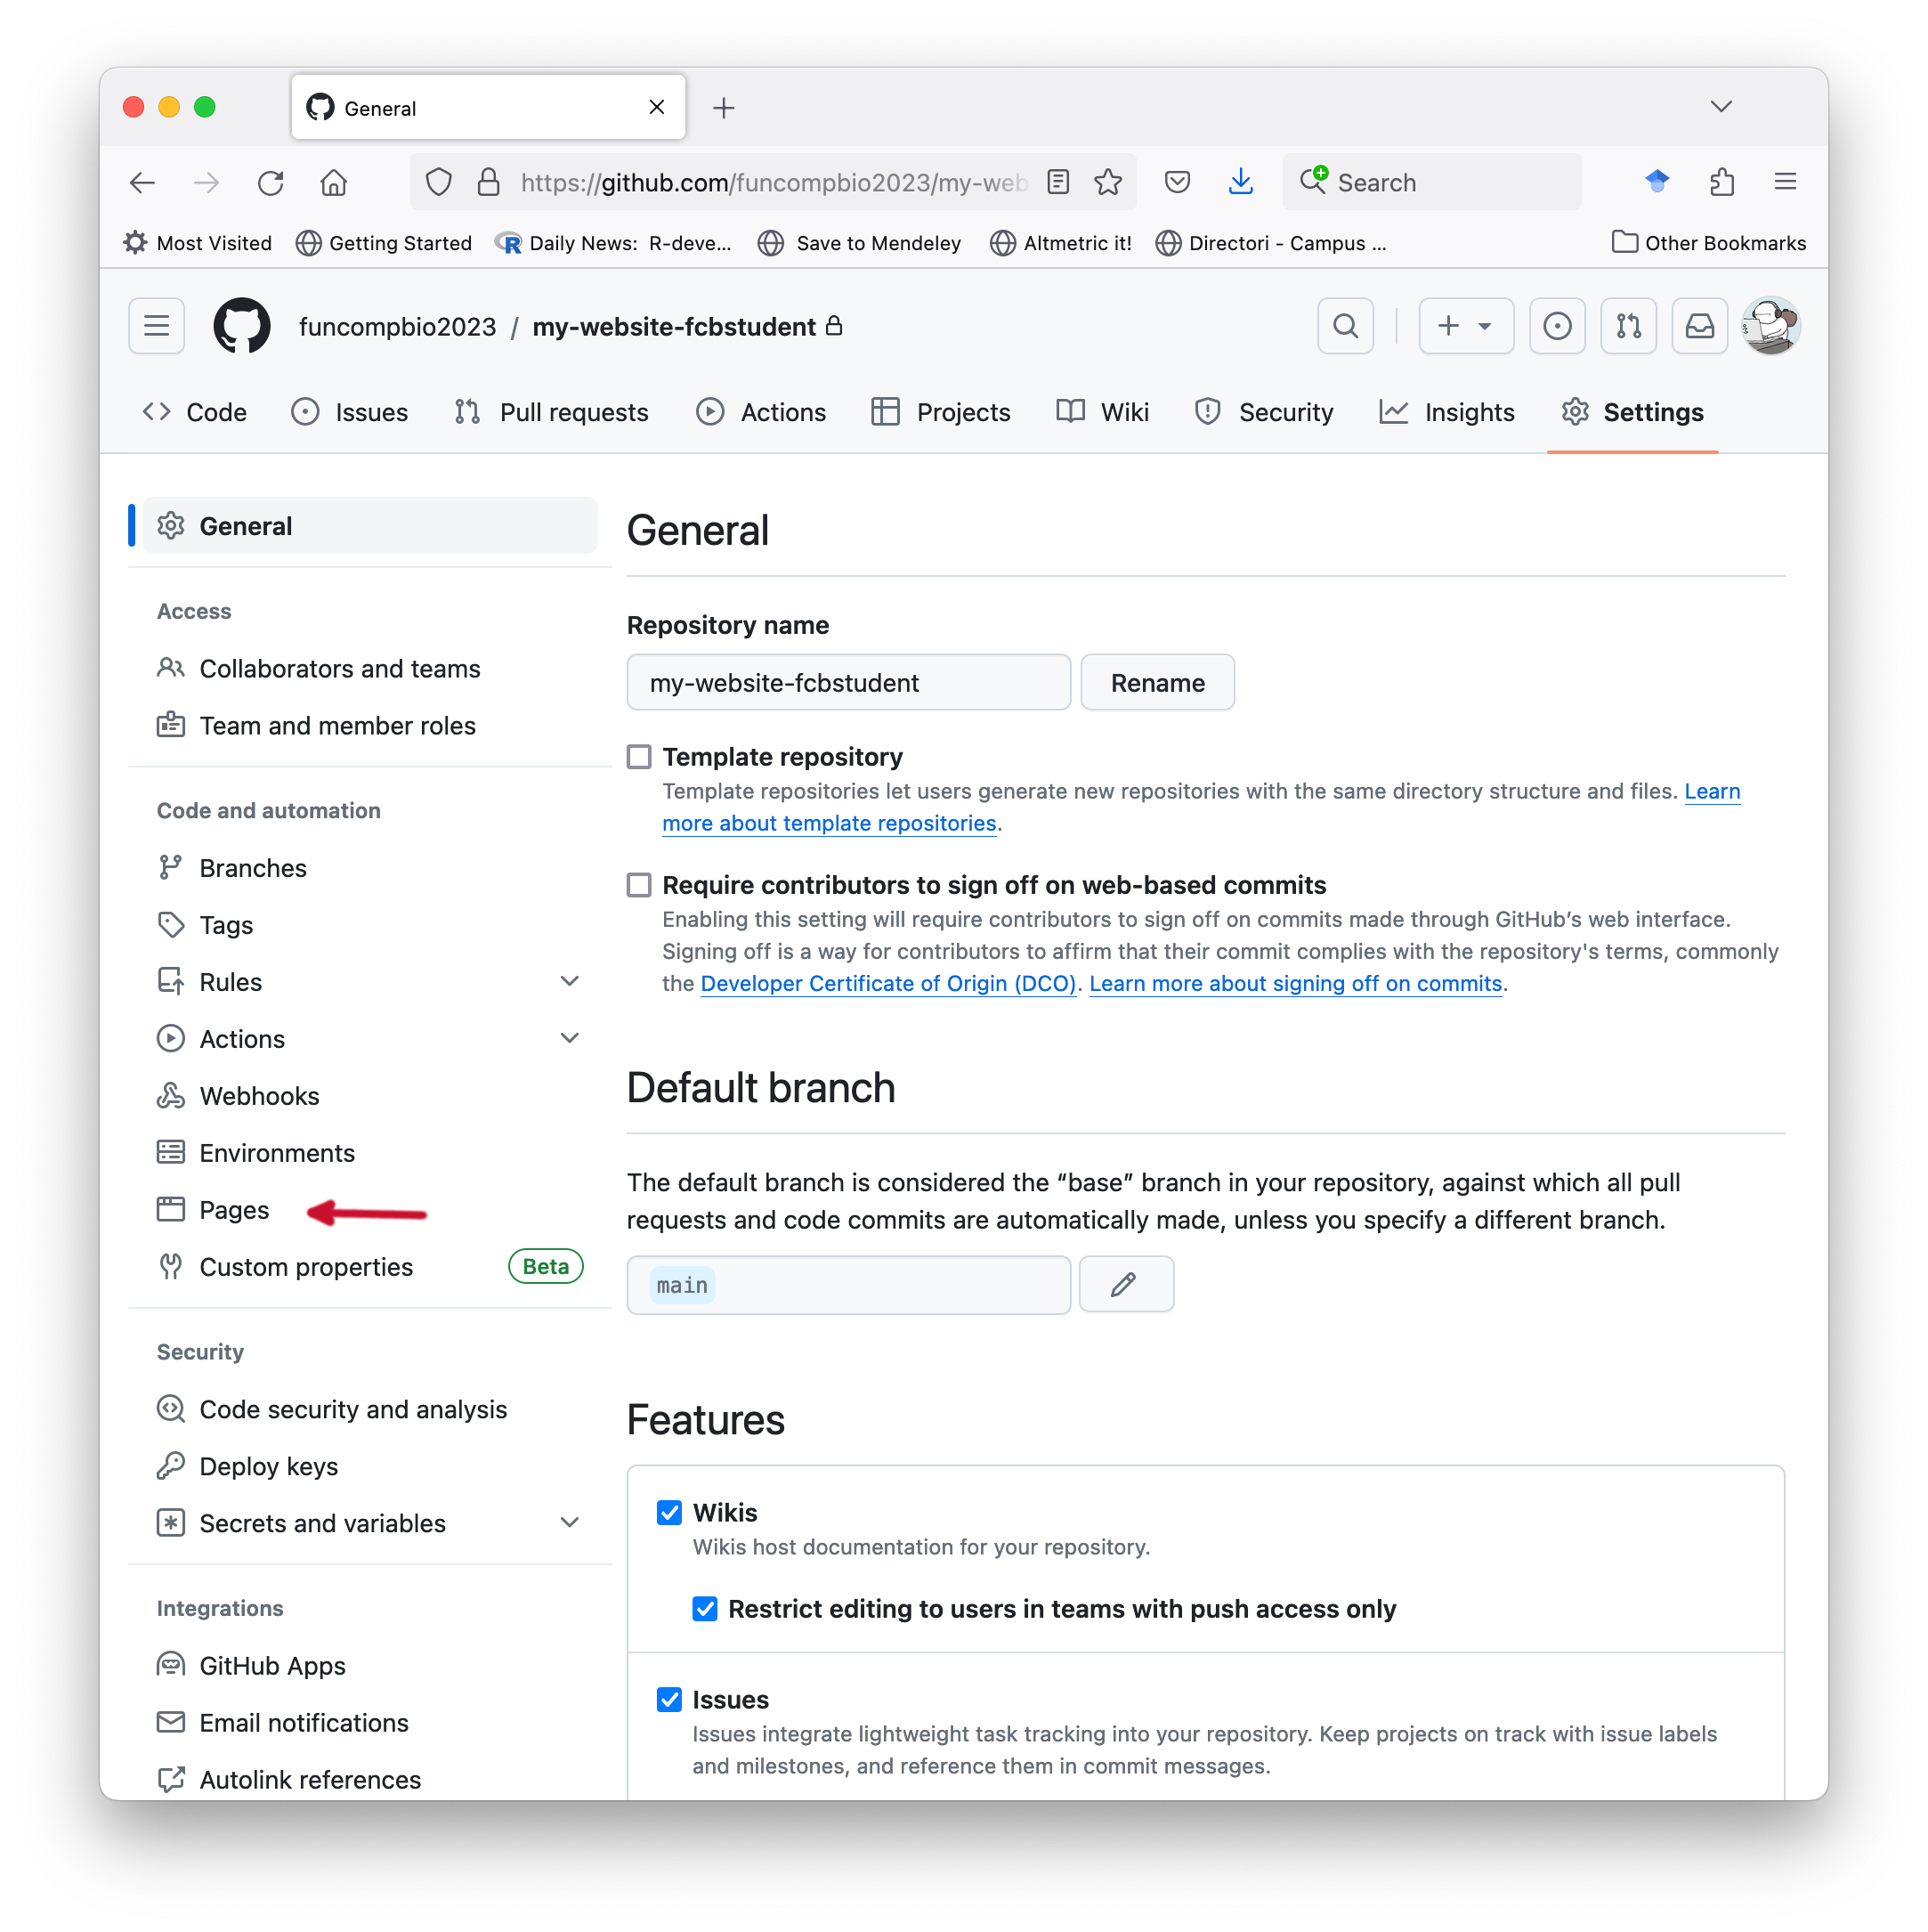
In the section Build and deployment, under the subsection Branch, click on the pull-down menu that by default says
Noneand select themainbranch.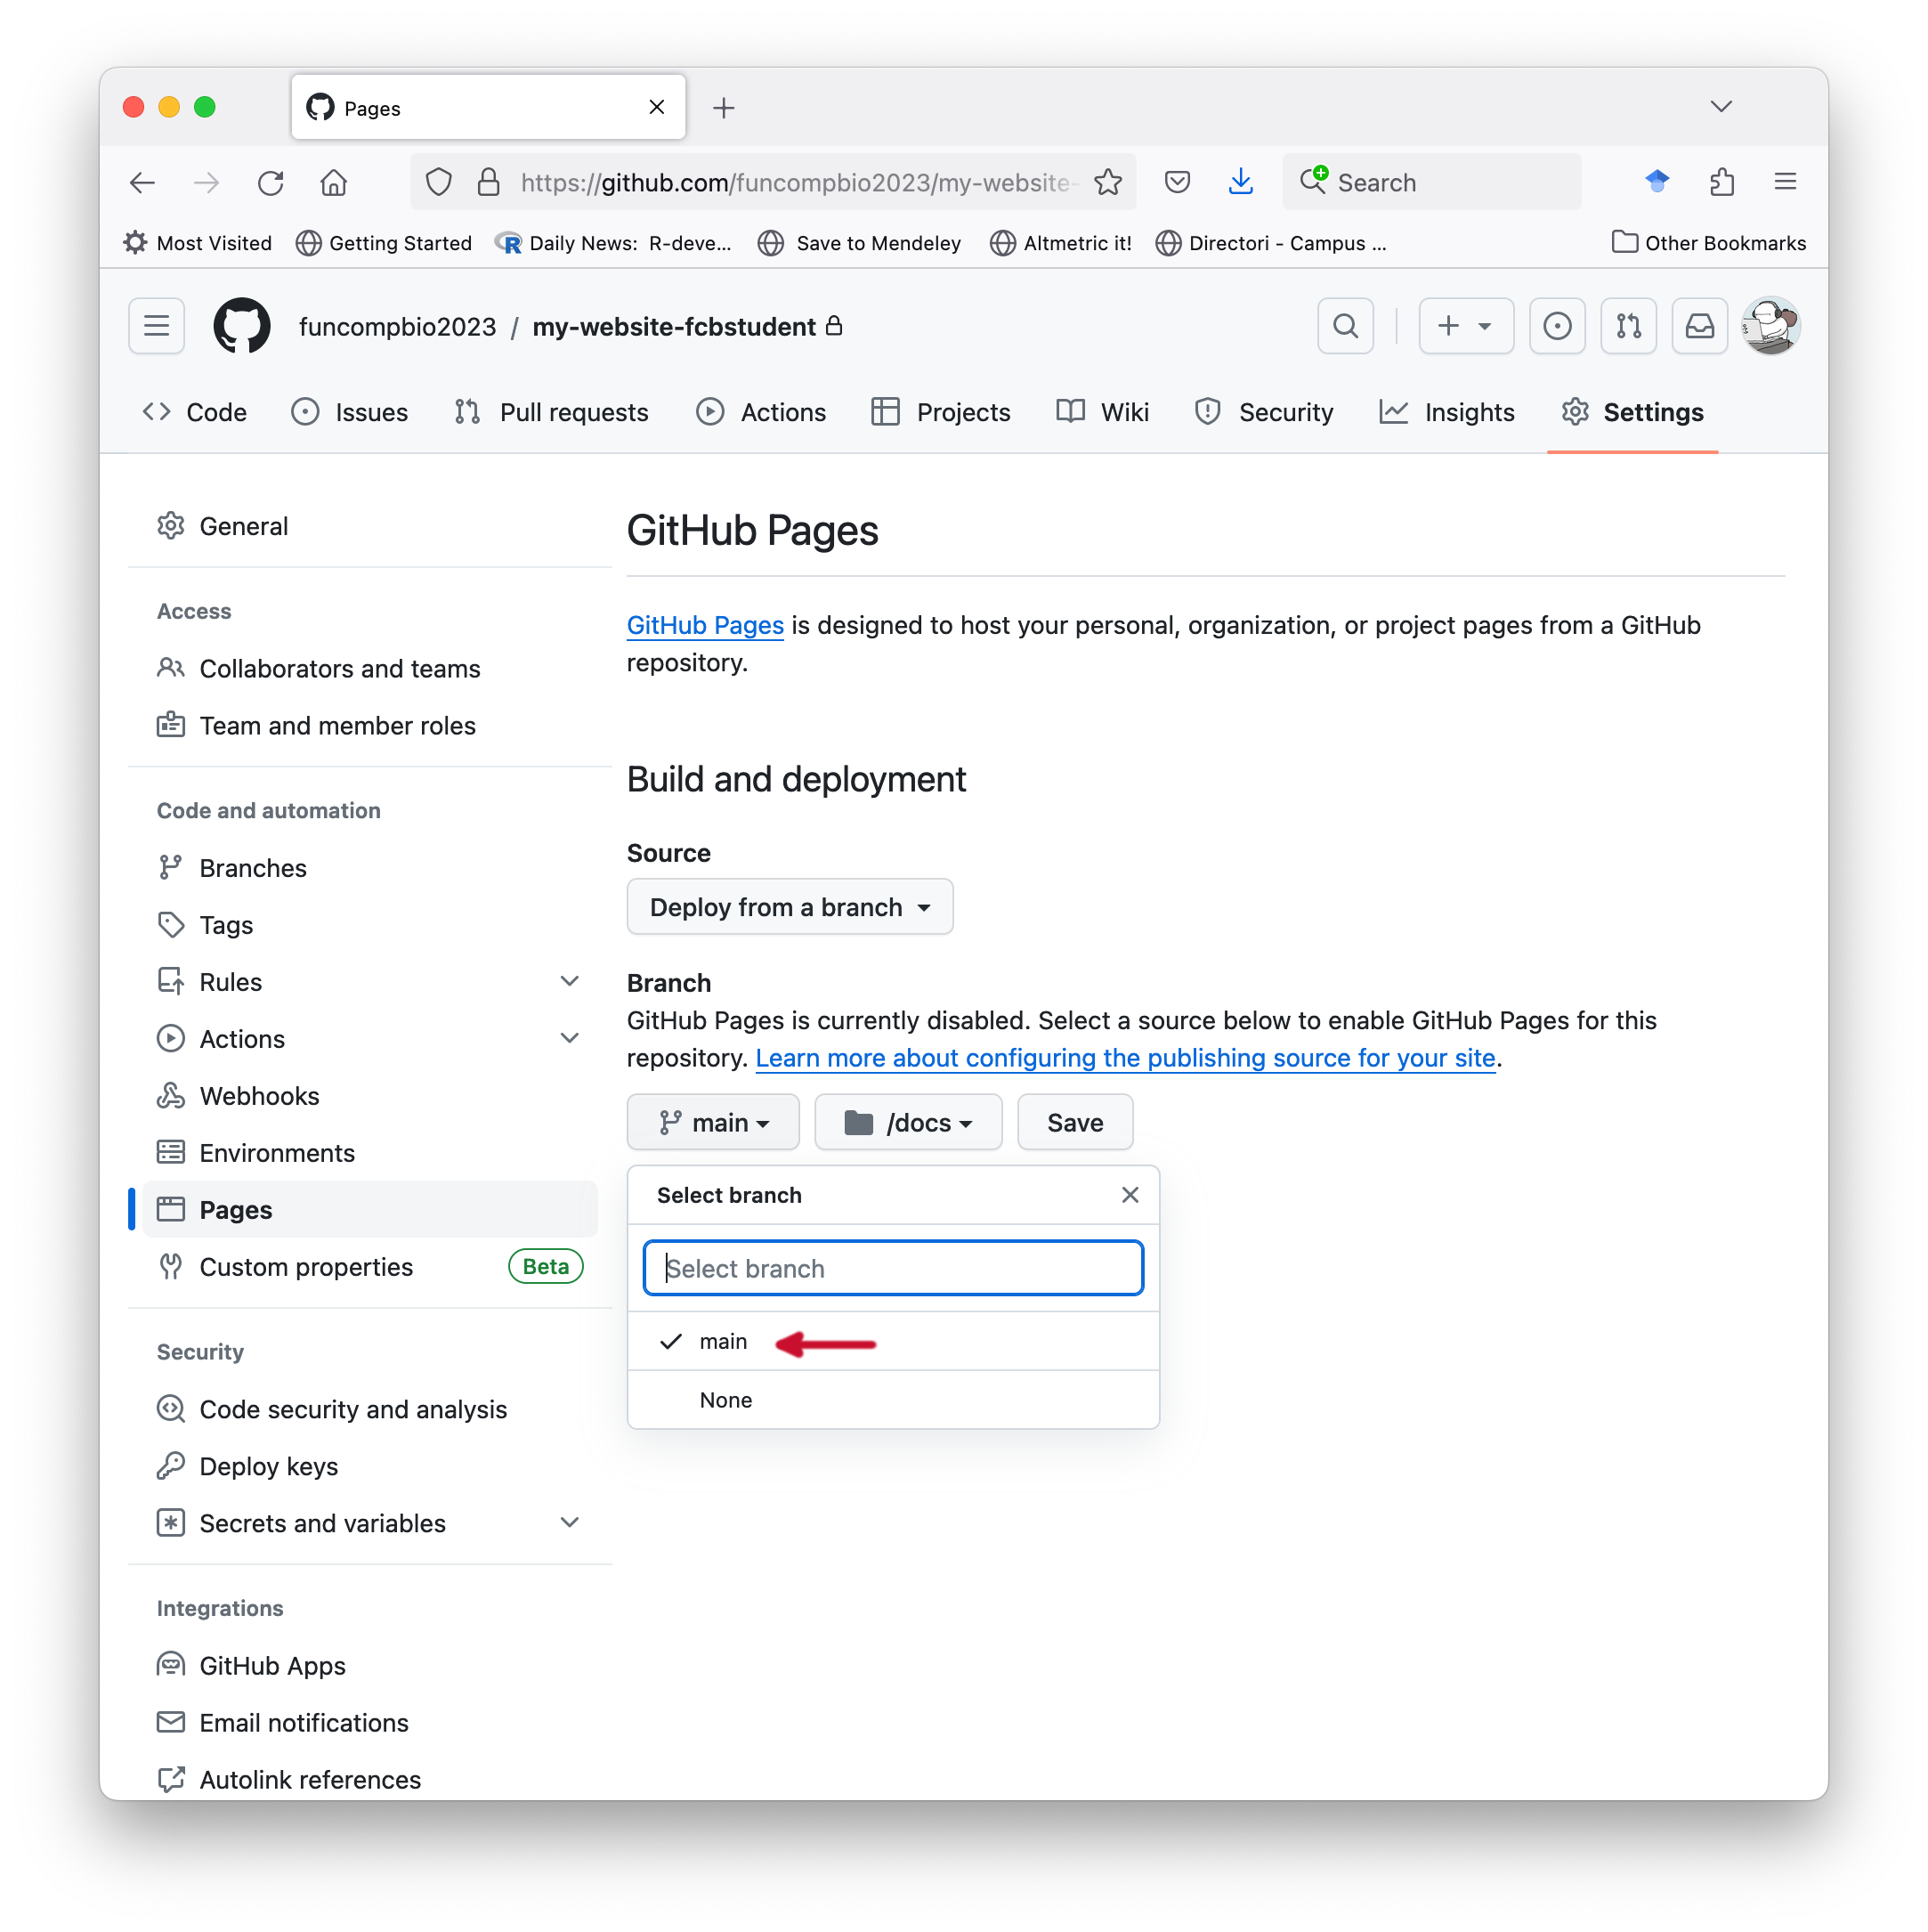
Click on the pull-down menu that says
/(root)and select/docs, then click on theSavebutton.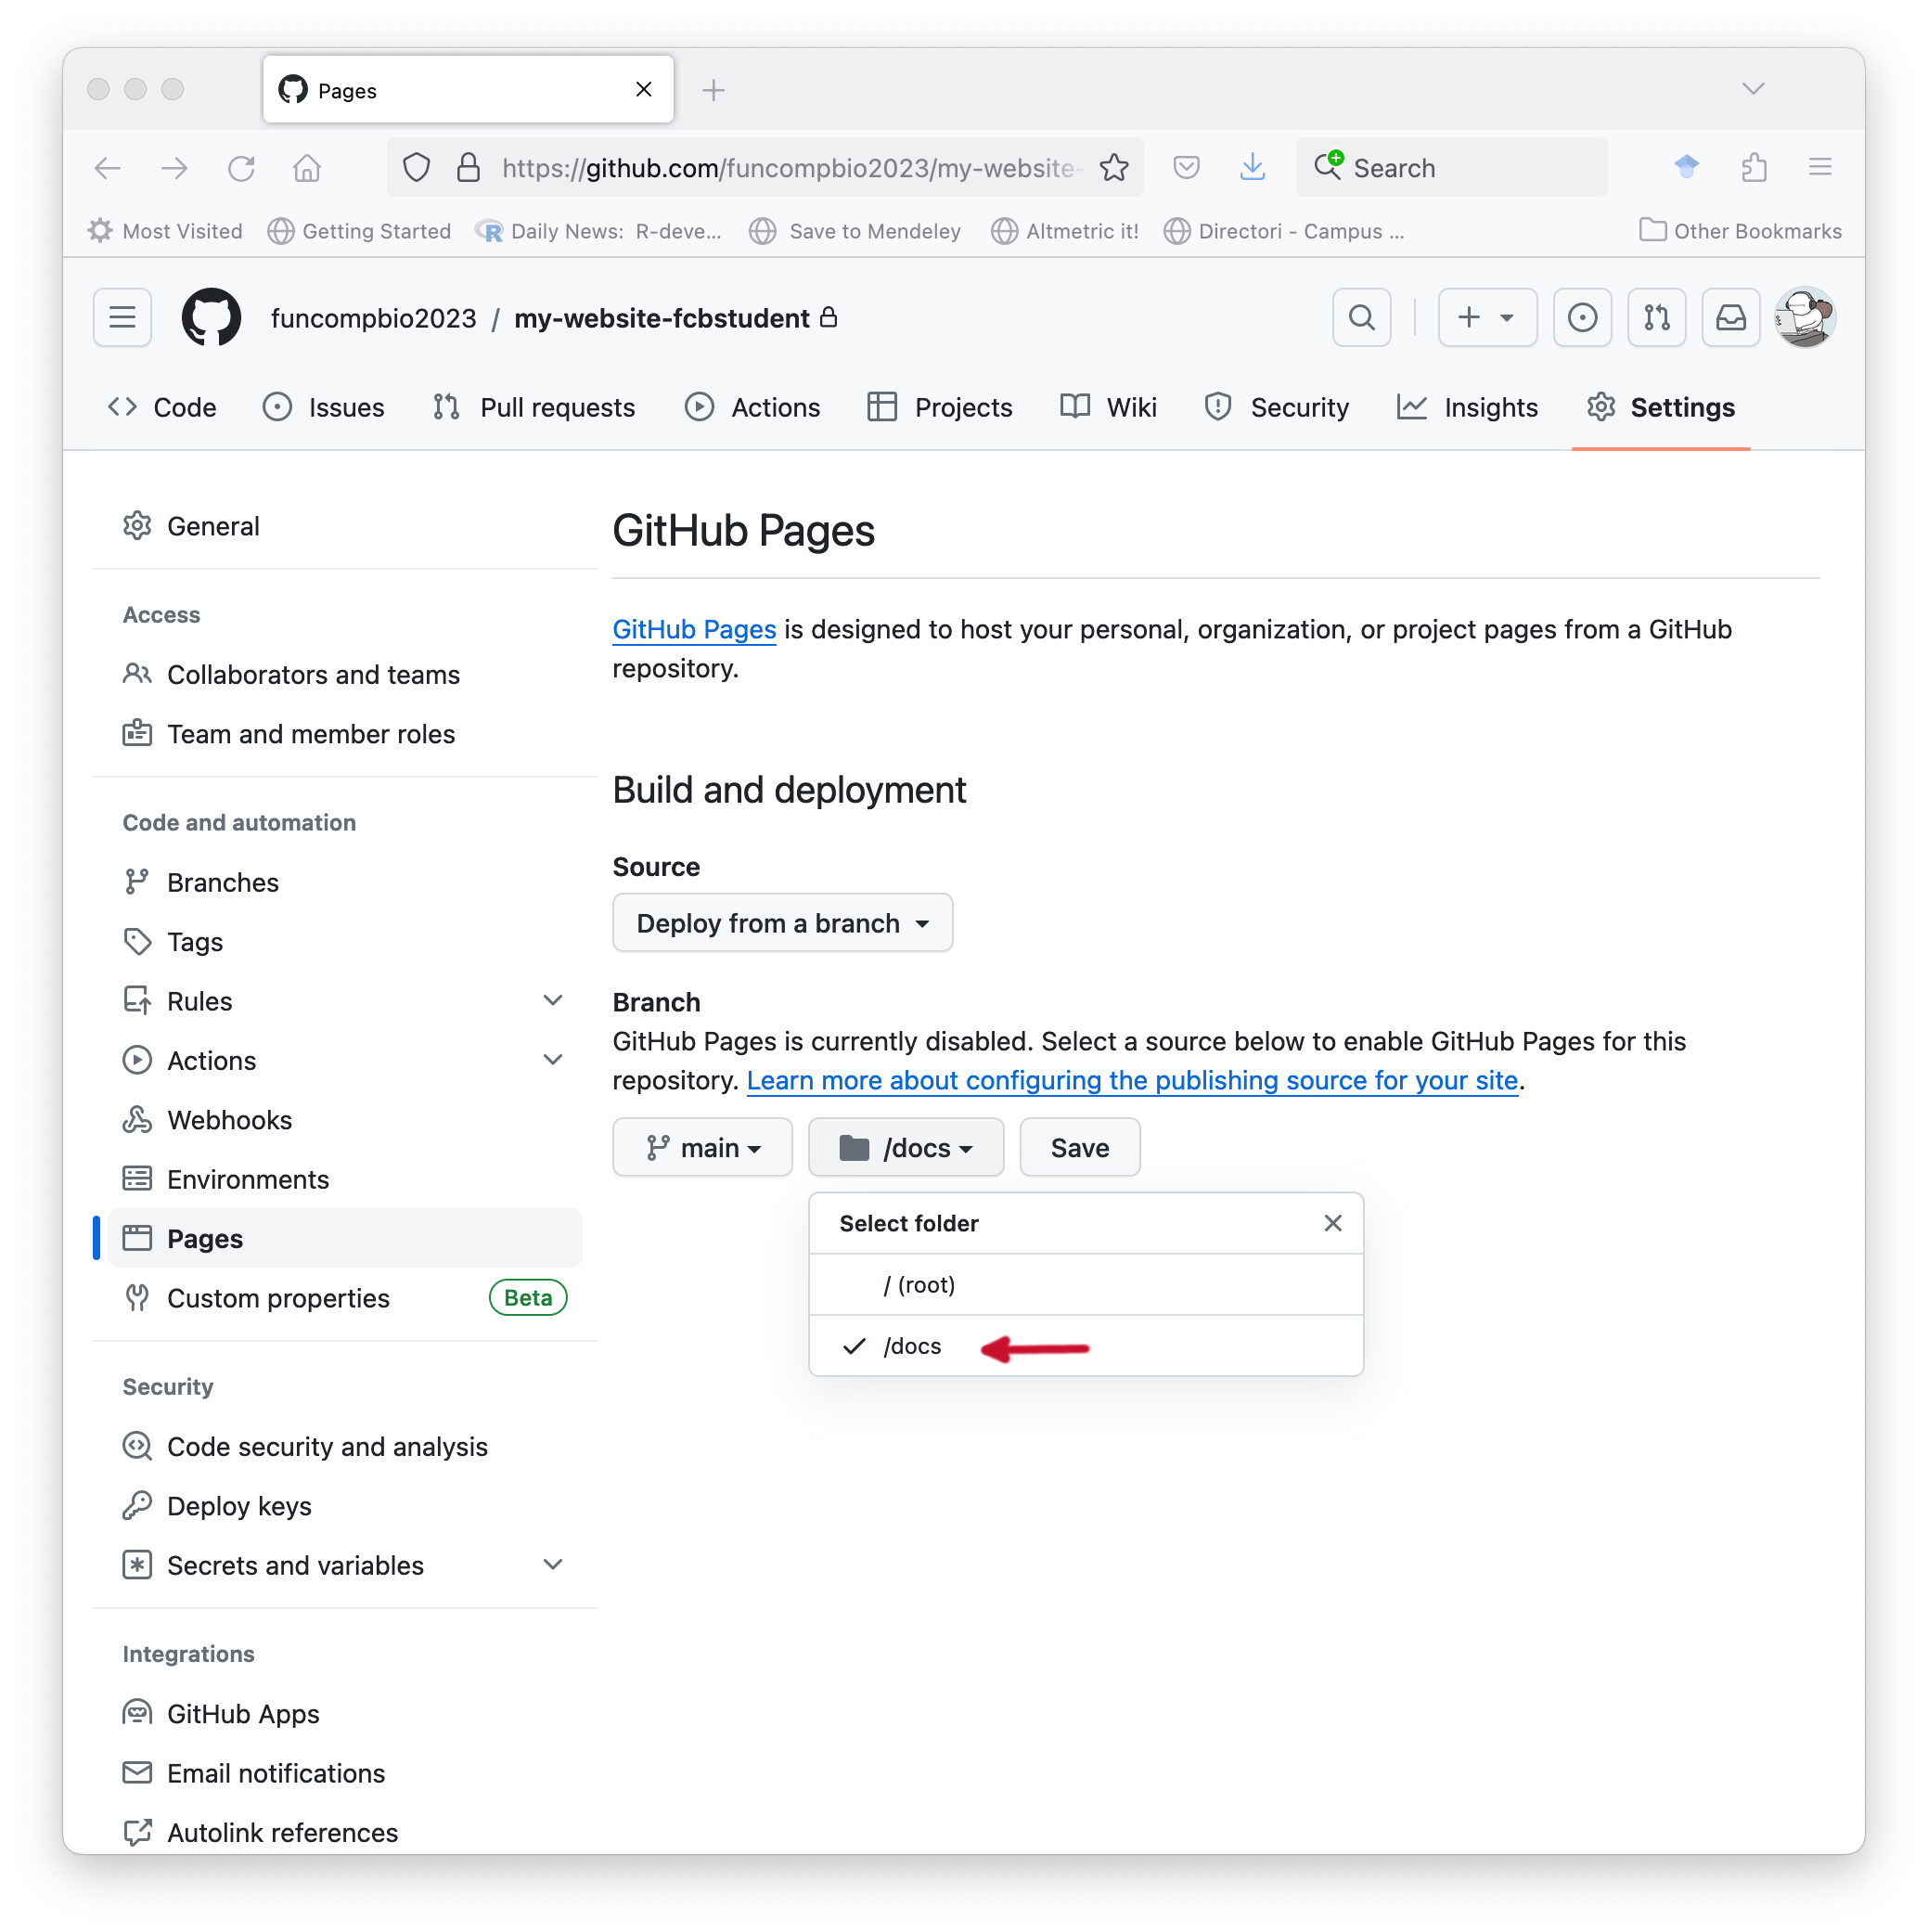
The GitHub Pages settings panel will refresh automatically and at the top you should see the message
GitHub Pages source saved. You should refresh the page through the reload button of the browser until you see a new message at the top that saysYour site is live atfollowed by an URL. That’s the URL of your website, open it up in a new tab of your web browser, either by right-clicking on the URL and selectingOpen link in new tabor by clicking on the buttonVisit sitethat appears next to the URL.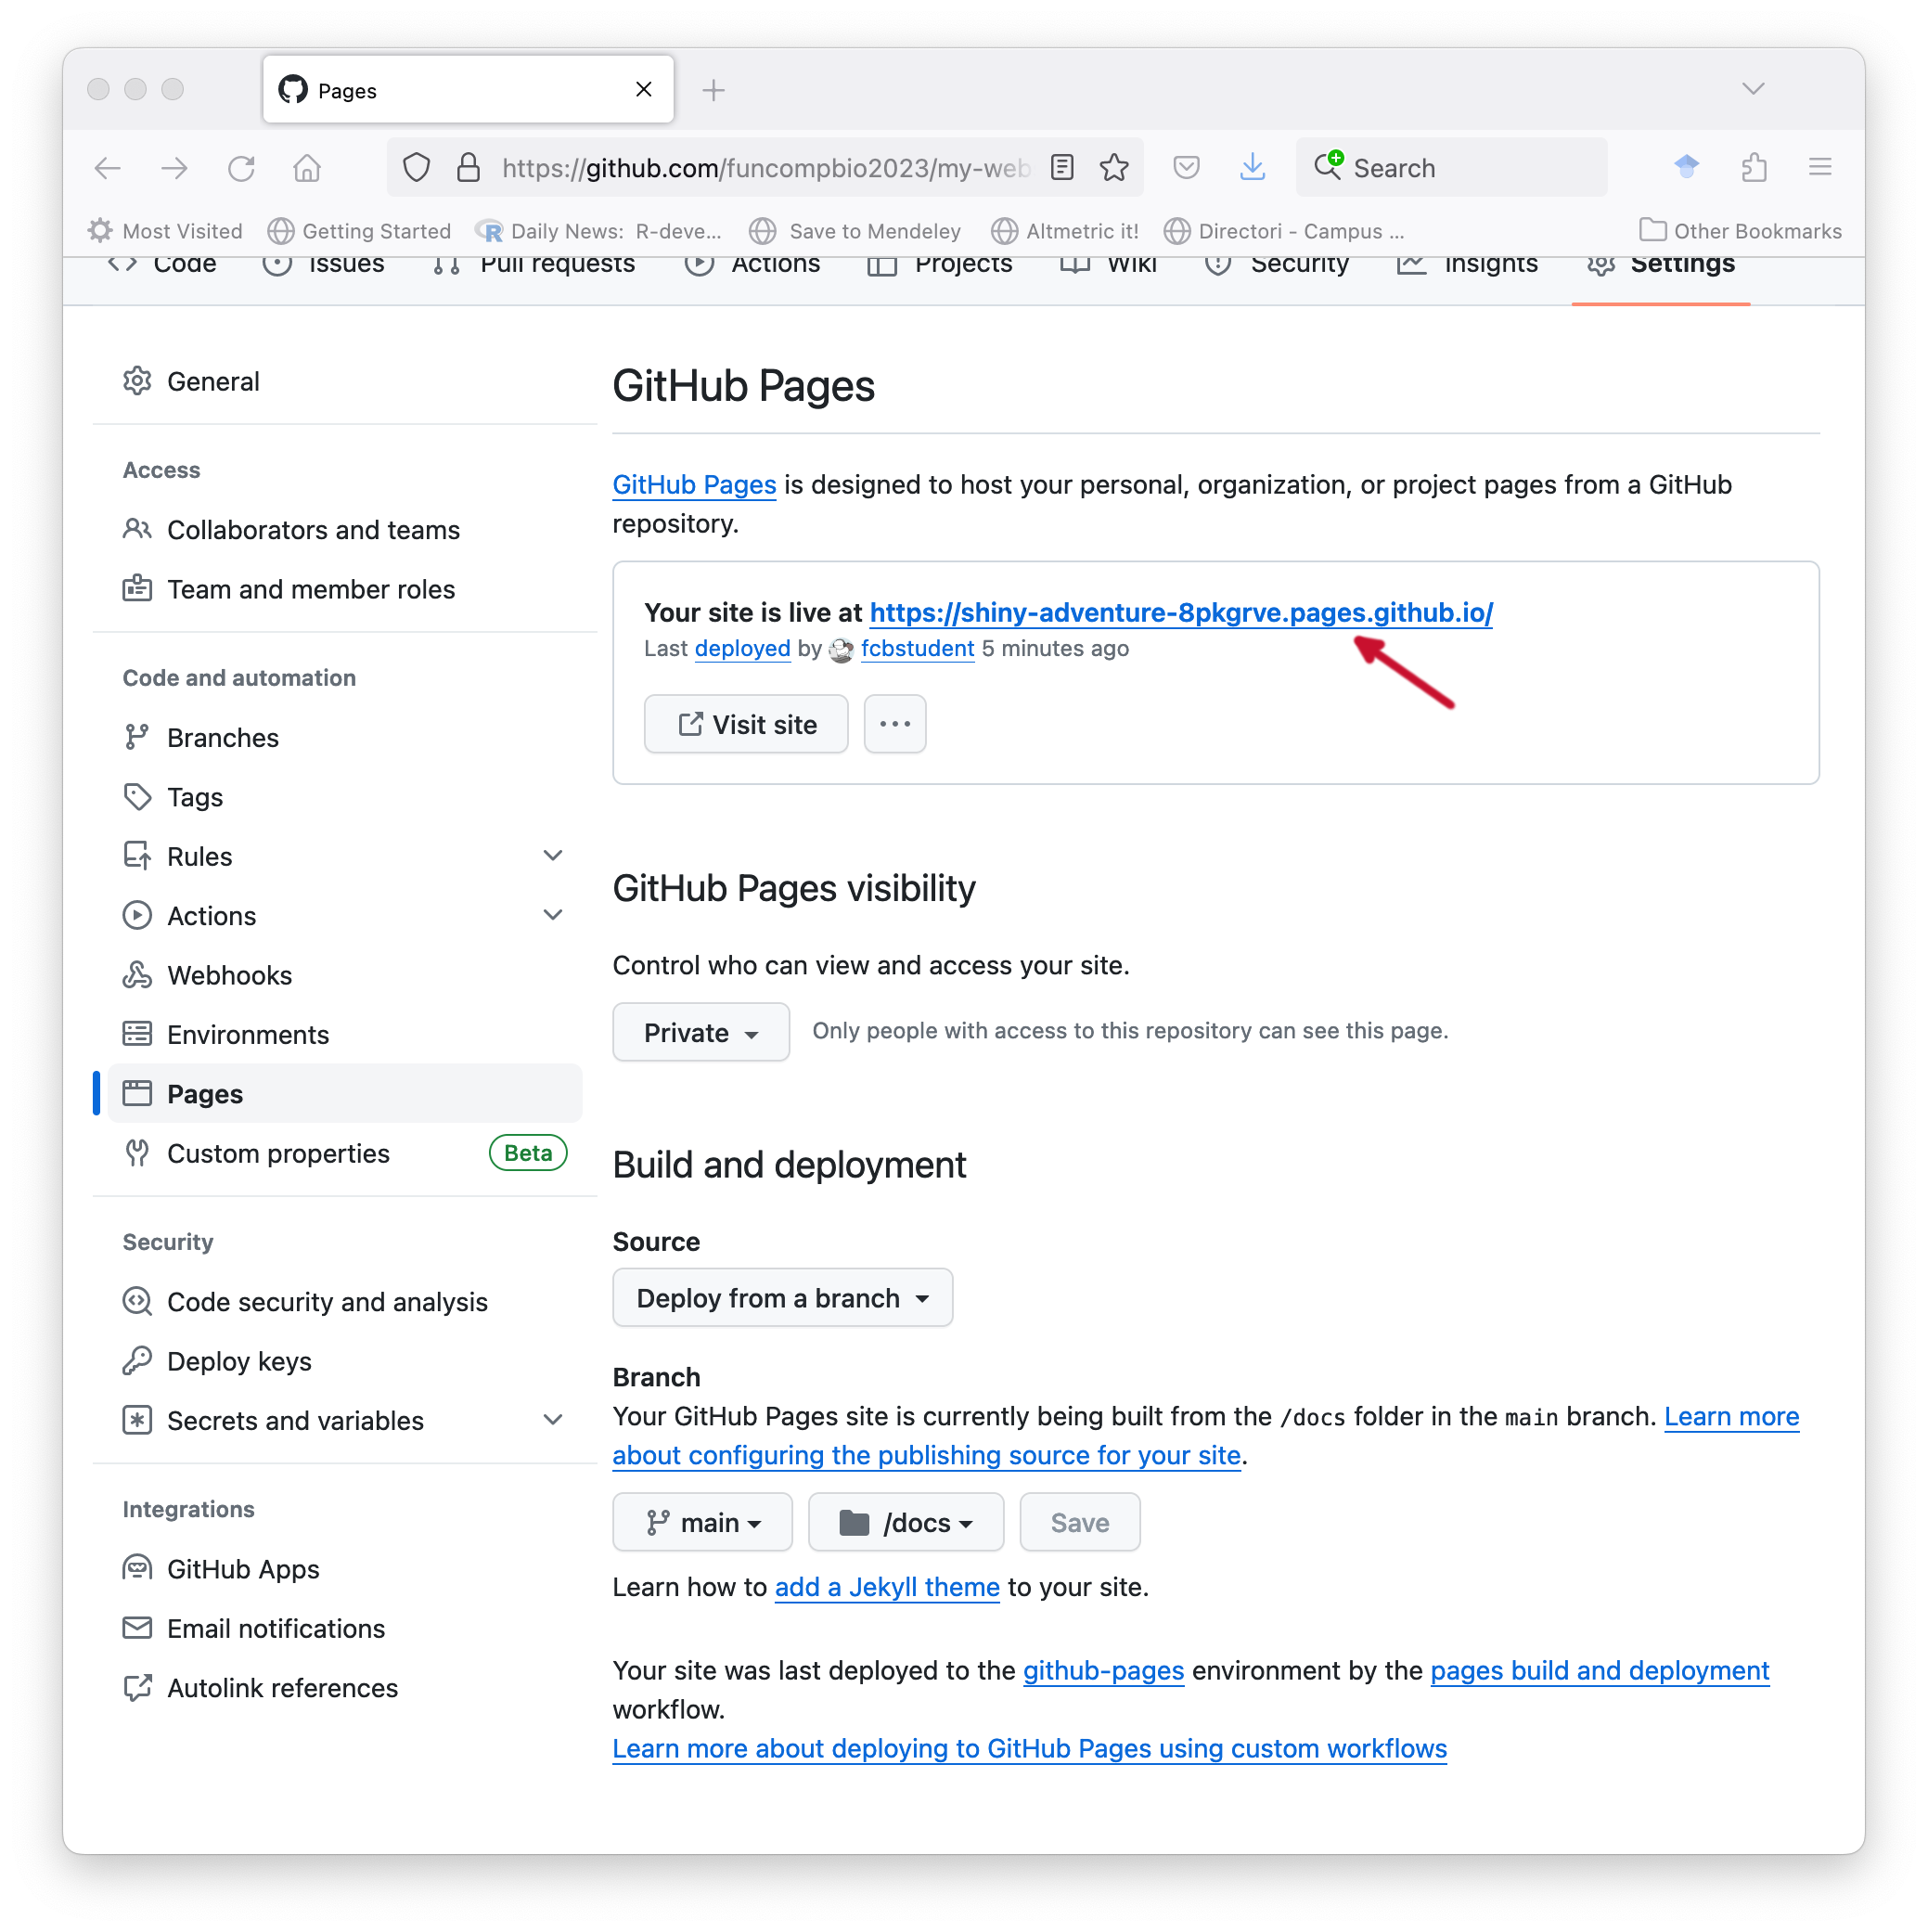
If there is any error in the website code, or the publishing source (branch and directory) is wrongly specified or not filled with content, GitHub will not show you the URL.
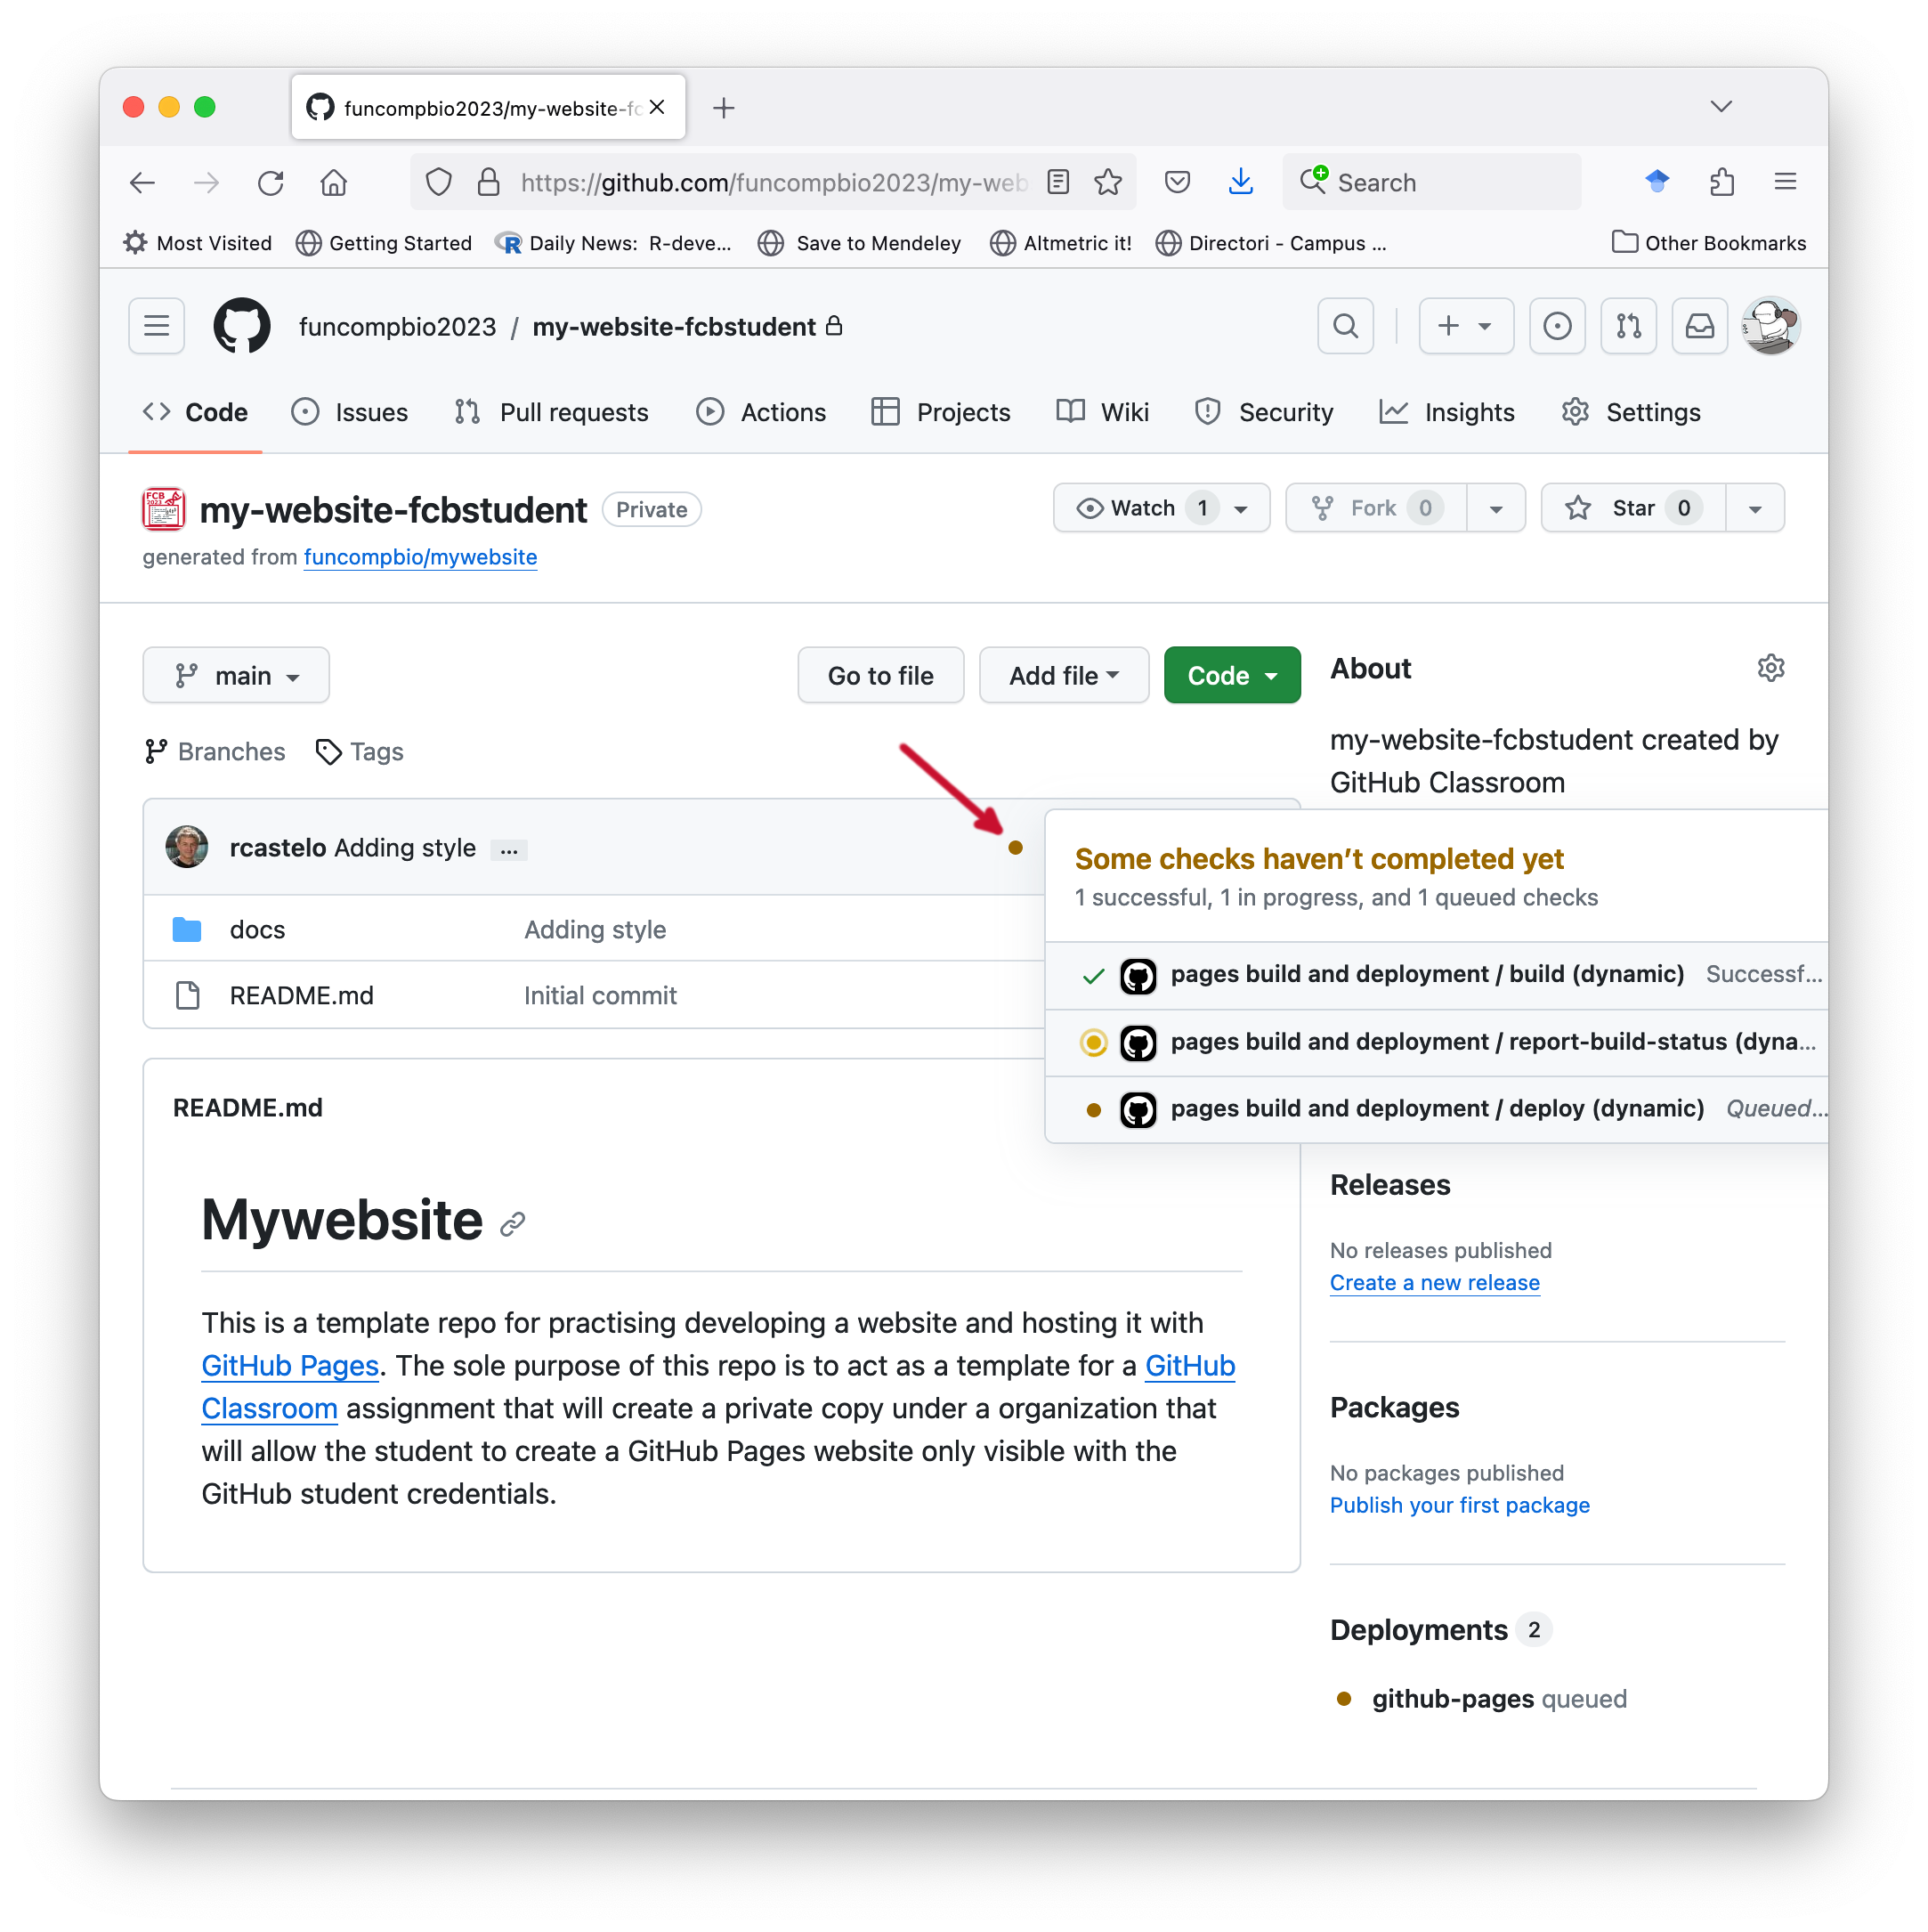
Each time that you push changes in the docs directory to
the remote GitHub repo, GitHub will have to rebuild and
publish your website, which may take a few minutes. You can see
how GitHub is building your website by going to the the page of your
GitHub repo at https://github.com/FCB-XXXX/my-website-YYYY
and clicking on the orange dot and then in the Details
links from the pop-up menu.
When that build is finished, you have to go to your website URL and press the reload button in your browser to see your website updated.
GitHub Pages offers the possibility to have an URL associated with
your GitHub account https://YYYY.github.io, where
YYYY is your GitHub username and have a public website
published under that URL. The steps to build that website are
essentially the same as the previous ones with the addition that the
repo hosting the publishing source of the website should be public and
called YYYY.github.io. A very well paced guide to create
such a public website with GitHub Pages is the one by Jonathan McGlone and
the GitHub
Learning Lab has also very good interative course. Another even
easier option to publish HTML files under a public URL is Netlify Drop, which can be handy
if you need to quickly share a website.
Markdown
We will learn Markdown as follows. In one tab of your browser open the CommonMark reference page. In another tab follow the 10-minute CommonMark tutorial.
Once you are finished with the tutorial, create a Markdown version of
your previous file index.html, i.e., a
index.md file, with all the previous content but formatted
using Markdown only. Store that index.md file in the
docs directory of the GitHub repo you created in the
previous section. Rename the file index.html to
old_index.html. Stage, commit and push these changes to the
remote GitHub repo. Checkout after a few minutes that the website has
been updated.