Practical 11
Last update: February 25th, 2026
Objectives
The learning objectives for this practical are:
- Configure Visual Studio (VS) Code for AI pair programming with GitHub Copilot.
- Learn using GitHub Copilot for AI pair programming.
- Learn how to give context to GitHub Copilot to get better code suggestions.
Setup and background
To do this practical you need an installation of the text editor VS
Code, R and RStudio. You can find the instructions in the setup link on how to install, VS Code, R and RStudio
in your system. Make a directory called practical11 for
this practical.
Adding the GitHub Copilot extension to Visual Studio Code
To add the GitHub Copilot extension to VS Code, follow these steps:
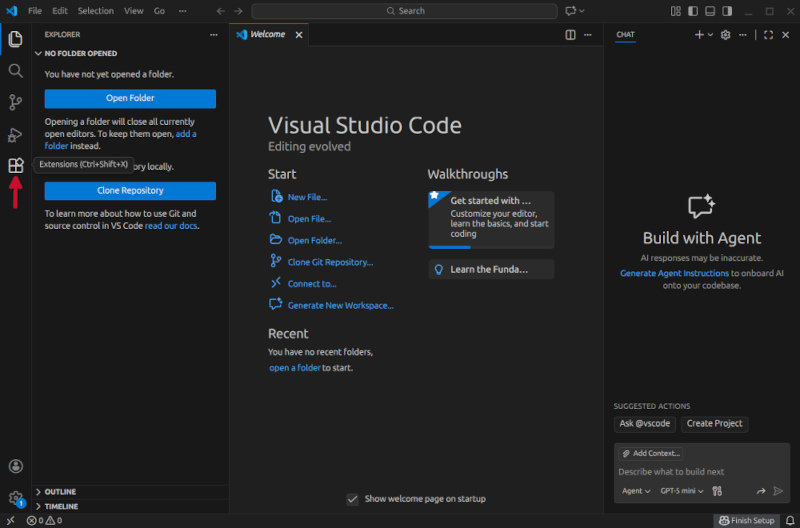
Open VS Code.
Click on the Extensions icon in the left sidebar (or press
Ctrl+Shift+X).
In the search bar, type “GitHub Copilot” and press Enter, and once you see the GitHub Copilot extension in the search results, click on the
Installbutton.
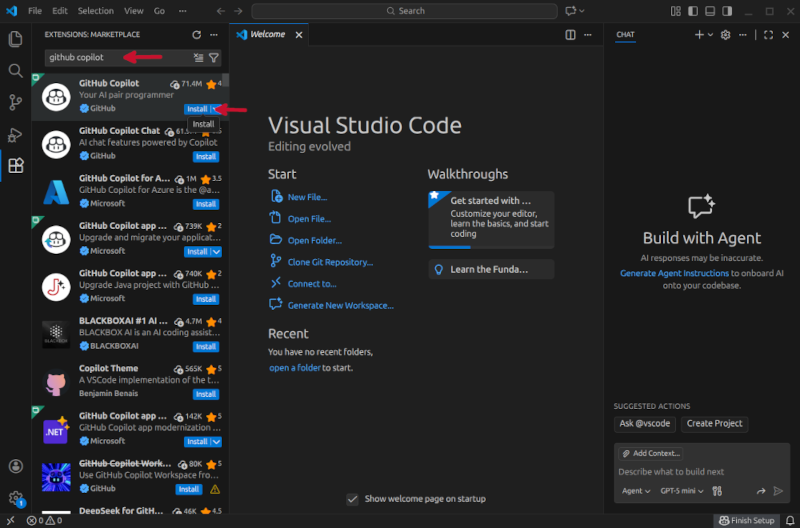
This will install in fact two extensions, GitHub Copilot and GitHub Copilot chat. The first one allows you to get in-line code suggestions as you type, while the second one is a conversational AI assistant that allows you to have a chat with GitHub Copilot to help you with your coding-specific tasks.
Link your GitHub account to Visual Studio Code
Once the GitHub Copilot extension is installed, you need to authenticate your GitHub account in VS Code. This will only work if your GitHub account has access to GitHub Copilot. If you don’t have access to GitHub Copilot, you can request access as a student by following the instructions in this link.
To authorise VS Code to access your GitHub account, follow these steps:
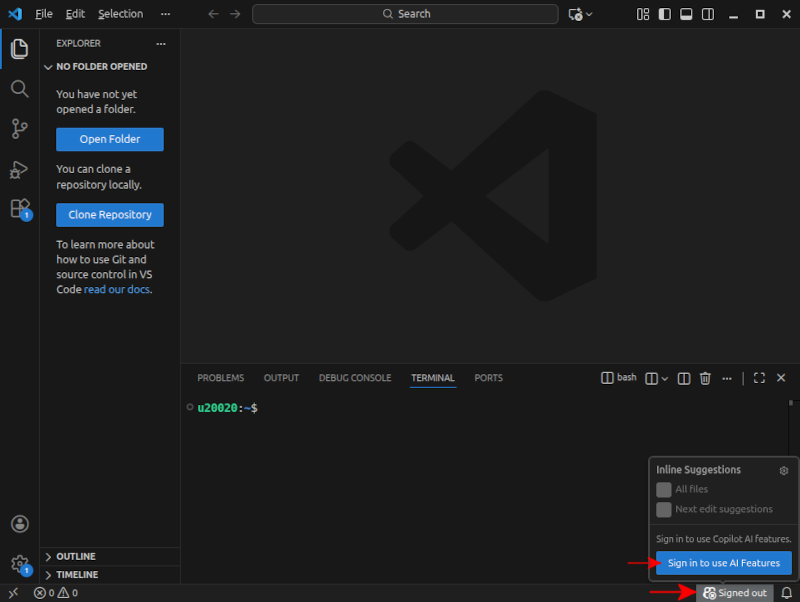
- Click on the GitHub Copilot icon in the bottom right corner of the
VS Code window, and then click on
Sign in to use AI Features.
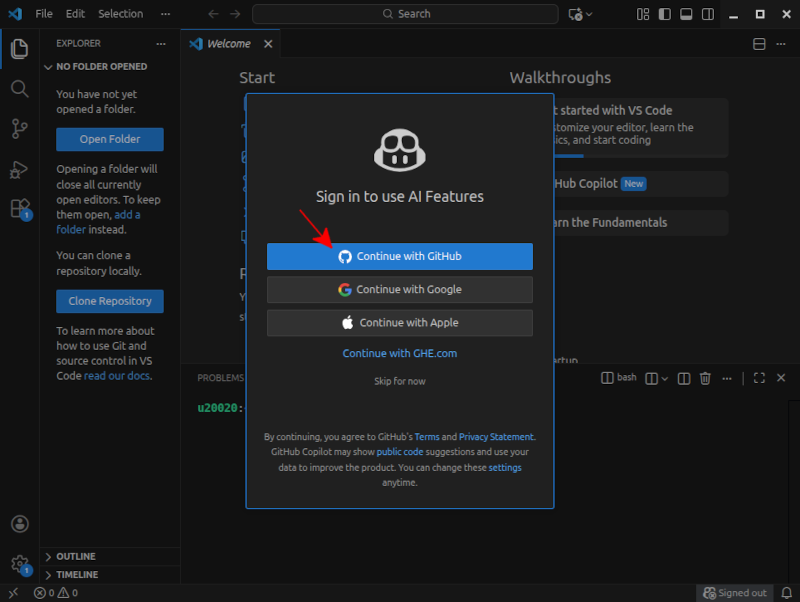
- This will open a popup window in VS Code asking you about what
option you want to use to sign in to your GitHub account. Click on
Continue with GitHub.
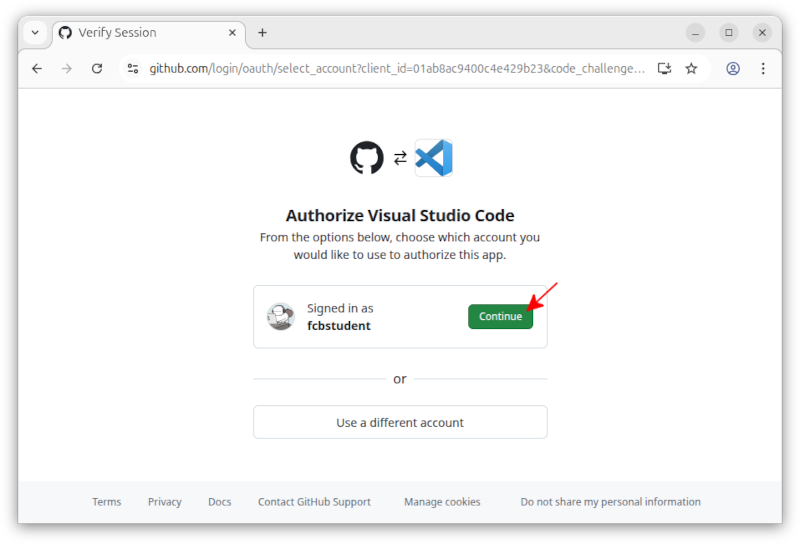
- This will open a new browser window where you will be asked to sign
in to your GitHub account, if you have not done it yet, and then
authorise VS Code to access your GitHub account. Click on
Continue.
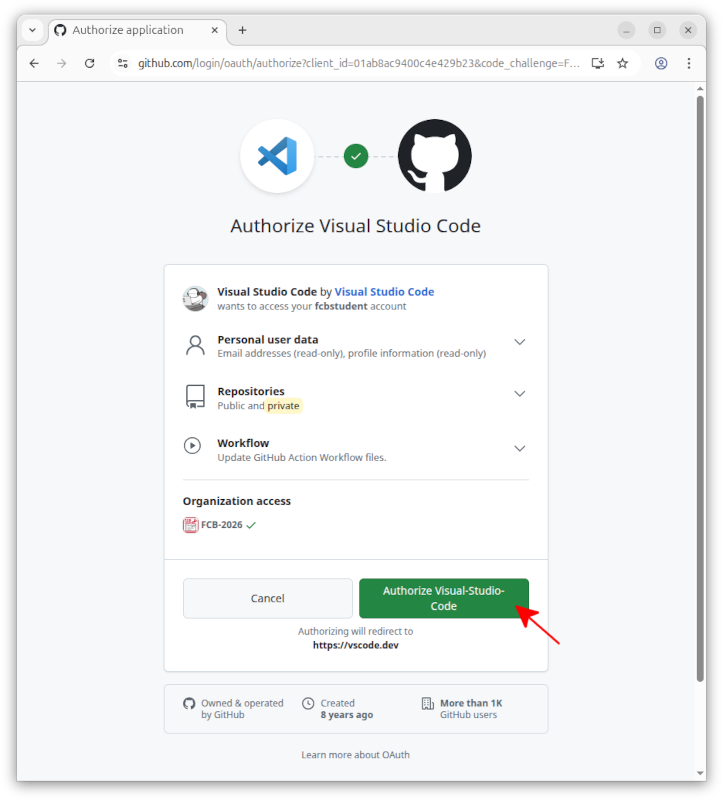
- In the next web page, you will be asked to authorise VS Code to
access your GitHub account. Click on
Authorise Visual Studio Code.
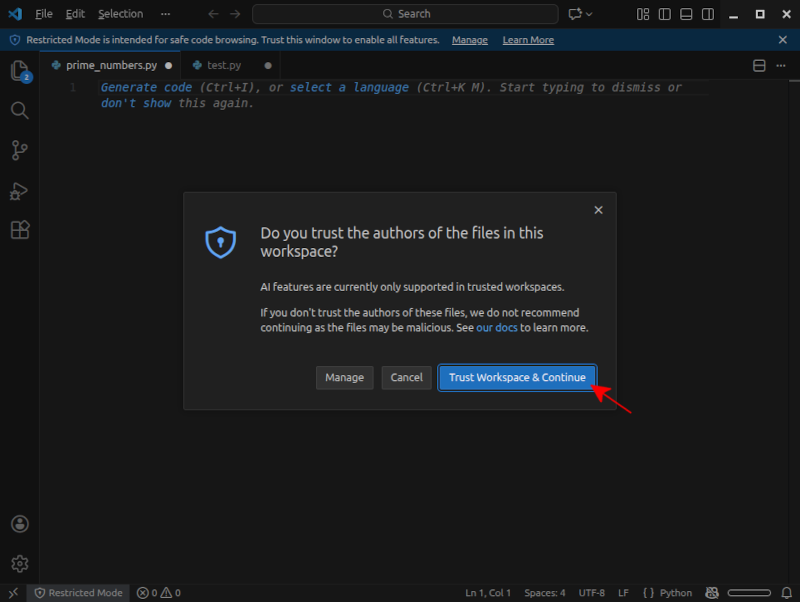
- Once you have authorised VS Code to access your GitHub account, you
should see a message in the web page saying
VS Code is now authorised to access your GitHub account. You can now close the web page and go back to VS Code, where you may be asked whether you trust the authors of the files in this workspace. Click onTrust Workspace & Continue.
Start using GitHub Copilot
If you GitHub acccount is properly linked to VS Code, you should see a tiny Copilot icon in the bottom right corner of the VS Code window. If this icon is not visible or is crossed out, it means that GitHub Copilot is not properly linked to your GitHub account. In such a case, go back to the previous section and make sure you have properly linked your GitHub account to VS Code.
Sometimes, the extensions may be installed and your GitHub account
properly linked, but VS Code may ask you to either trust the current
workspace/file that you have opened, or to click a the popup window
saying Enable AI features.
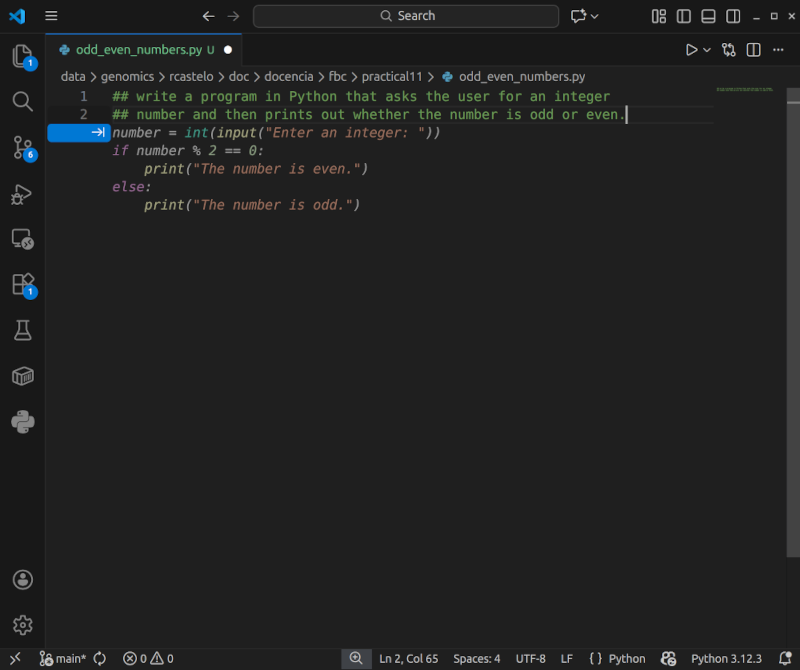
To start using GitHub Copilot, open a new file in VS Code called
odd_even_numbers.py, in the
practical11 directory, and type the following two
comment lines:
## write a program in Python that asks the user for an integer
## number and then prints out whether the number is odd or even.
As you type the second comment line, you should see a suggestion from GitHub Copilot appearing in light grey text, like in the image below. While the primary supported language for prompts and chatting with GitHub Copilot is English, you can also use other languages, such as Catalan or Spanish, so feel free to write the comments in any language you prefer.
This suggestion is the code that GitHub Copilot thinks is the most
likely to be what you want to write based on the comments you have
written and the context of the file. To accept the suggestion, press the
Tab key, and now save the file and run it in the shell to
see that it works as expected.
Exercise: Open in VS Code a new file called
perfect_numbers.py in the practical10
directory and, using GitHub Copilot, write a Python program that asks
the user for an integer number and then prints out whether the number is
a perfect number or not. A perfect number is a positive integer that is
equal to the sum of its proper divisors, i.e., excluding itself from the
sum. For example, 6 is a perfect number because its positive divisors
are 1, 2, and 3, and their sum is 6. Once the program is ready, save the
file and run it in the shell to see that it works as expected.
Modifying code with GitHub Copilot Chat
Open the Copilot Chat extension (clicking on the right of the search
text box) and ask GitHub Copilot to modify the
perfect_numbers.py program to take the input number from
the command line instead of asking the user for it, by typing the
following prompt in the chat window:
modify this program to take the input number from the command line instead of
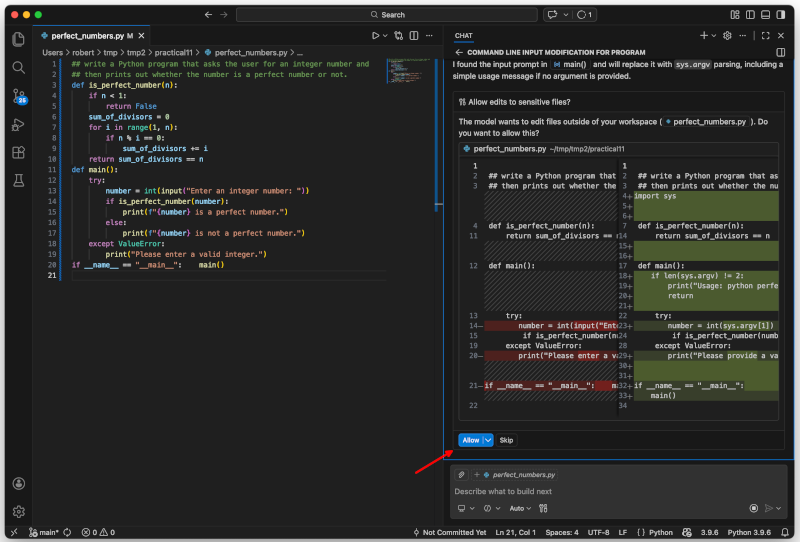
asking the user for it.After some thinking, GitHub Copilot will suggest a modified version
of the program, and you can accept the suggestion by clicking on the
Allow button shown in the image below.
GitHub Copilot will modify the program as you have asked, and will
give you the option to keep the modified code or undo the suggested
edits. Click on the button Keep shown in the image
below.

Now save the file, go to the Unix command line and verify that the modified program works as expected by calling it as follows:
$ python perfect_numbers.py 6How to get explanations from GitHub Copilot
GitHub Copilot can also provide explanations for the code it suggests. For instance, in the previous example, type in the Copilot Chat window the following prompt, selecting the first option that appears in the dropdown menu as shown in the image below.:
/explain the function is_perfect_number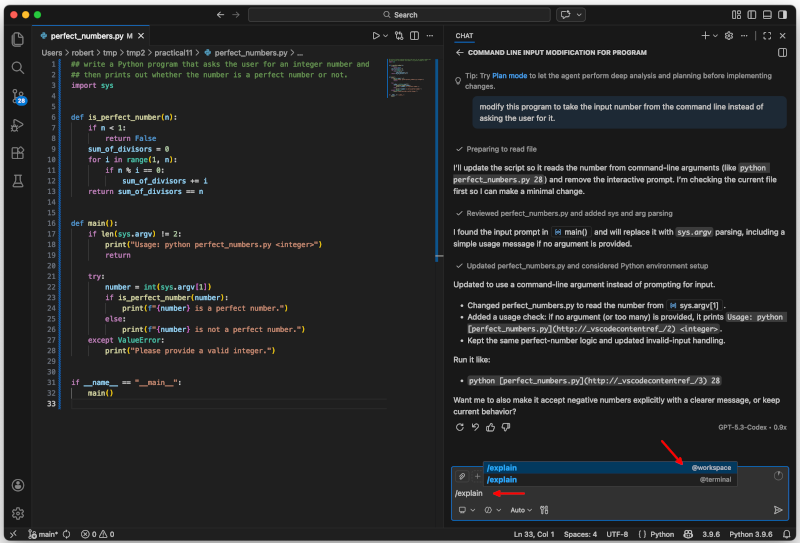
How to give context to GitHub Copilot
Before we start this section, close all files you have opened in VS Code, and close VS Code itself.
To get suggestions from GitHub Copilot adapted to your needs, you
should give it context about what you want to do and how you want to do
it. The first step to enable GitHub Copilot to learn the context in
which you want to work is to create a directory specific for the project
you want to work on, and then open that directory with VS Code. For
instance, let’s say we want to learn how to write simple programs in
Python using only while and if statements, avoiding the use of the
range() function and the += adding notation.
Let’s create a directory called my_first_python_programs
outside the practical11 directory, and
then open that directory with VS Code by typing on the shell:
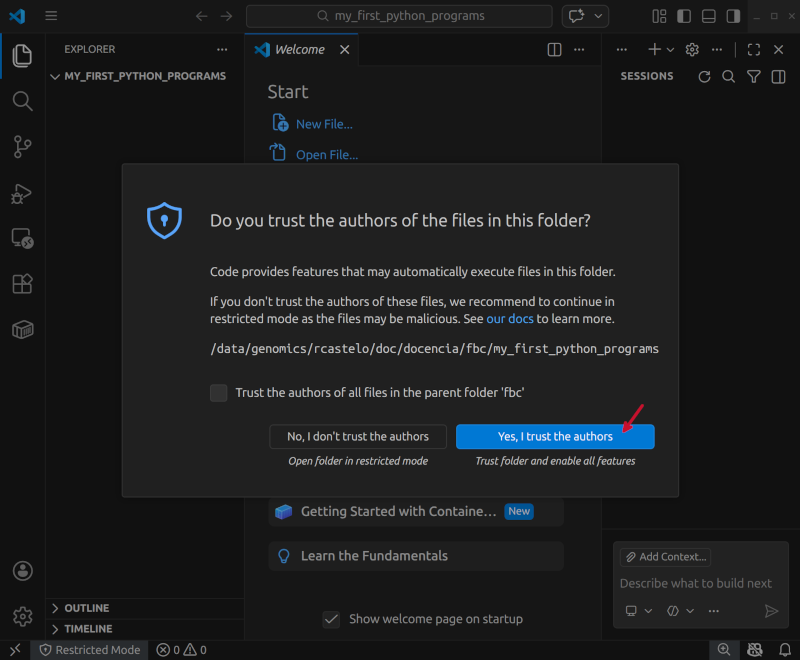
$ code my_first_python_programsVS Code will ask you whether you trust the authors of the files in
this directory, and you should click on
Yes, I trust the authors as shown in the image below.
Now, open the GitHub Copilot Chat extension and type the following
prompt in the chat window and press Enter.
/init help writing simple programs in Python to learn programming, using only
while and if statements, avoid using the range() function and the += adding
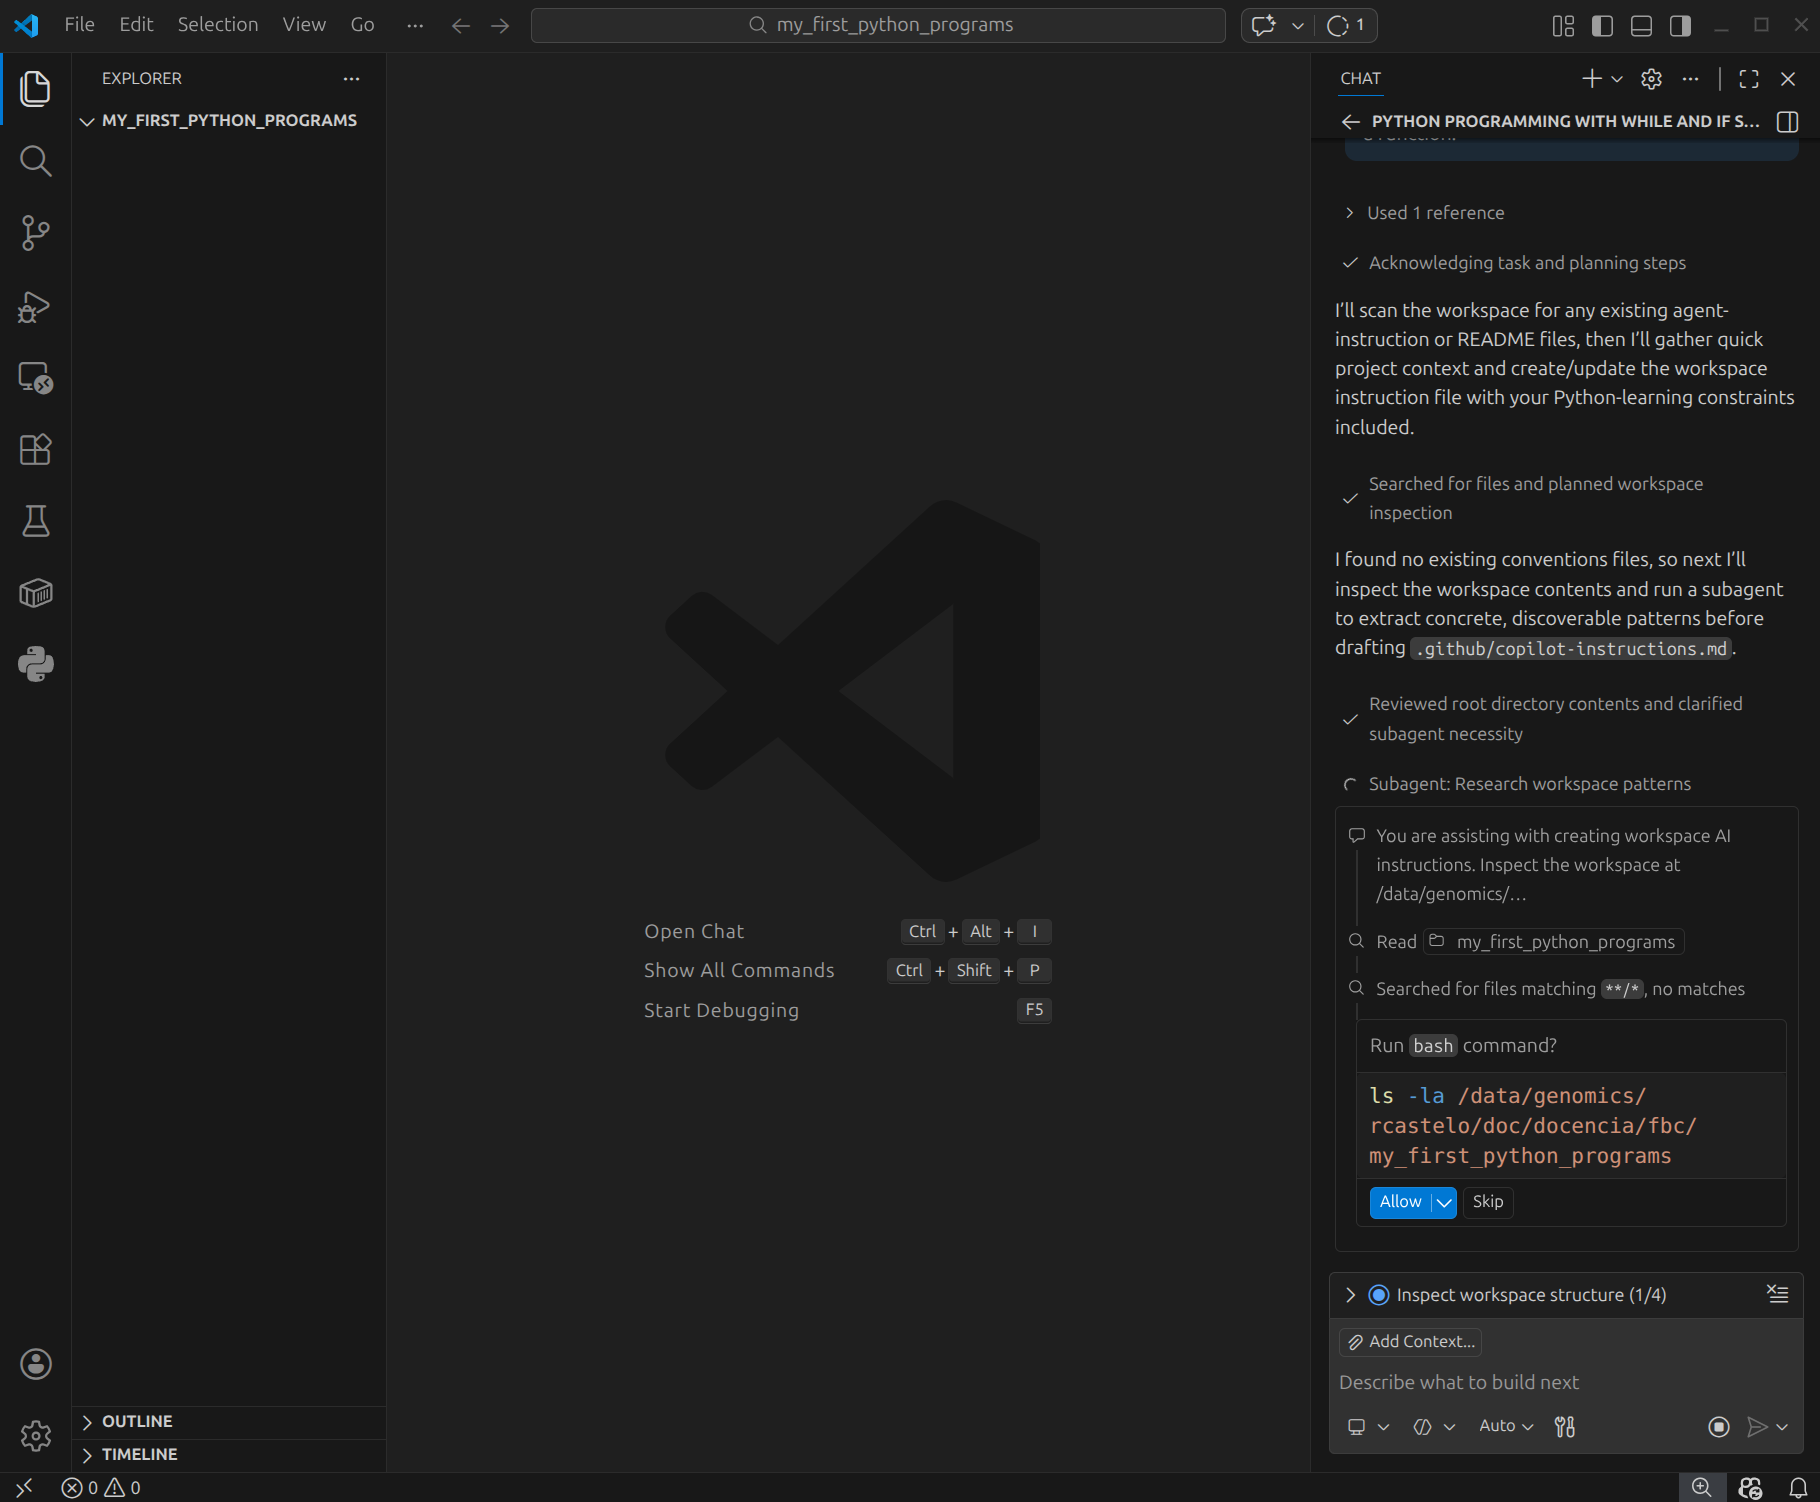
notation. Write code outside a function.VS Code will start scanning the files in the directory, which is
empty, and will ask you whether it should scan other files in your
system, click on Skip as shown in the image below.
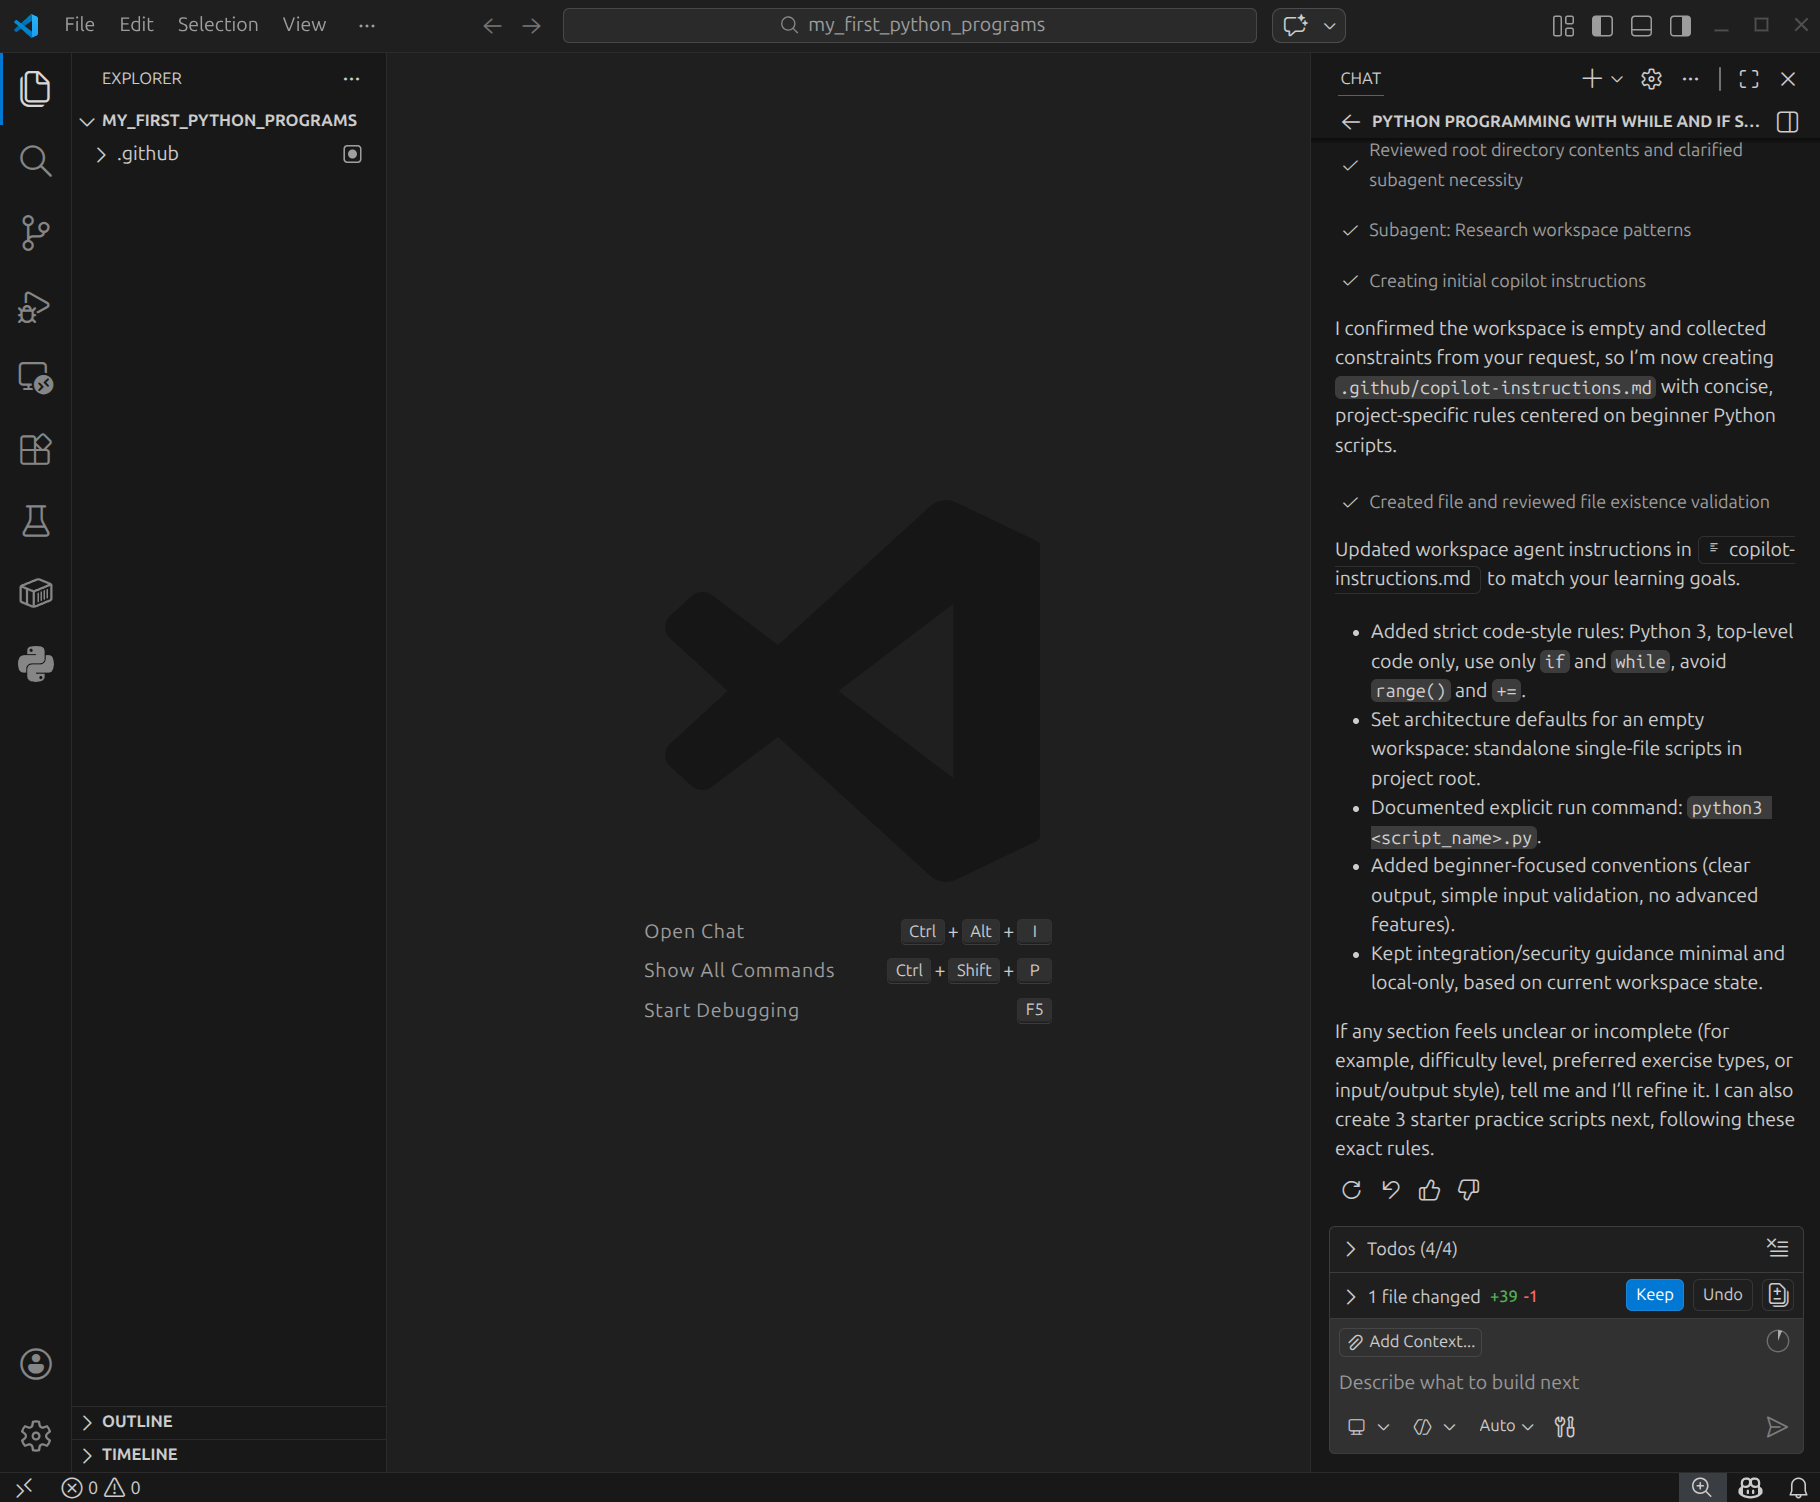
GitHub Copilot should have created a hidden directory called
.github with a Markdown file called
copilot-instructions.md in it, and will ask you whether you
want to keep that file, click on Keep as shown in the image
below.
If somehow, VS Code has not created the hidden
directory .github with the file
copilot-instructions.md in it, then type in the Copilot
chat window the following prompt and press Enter:
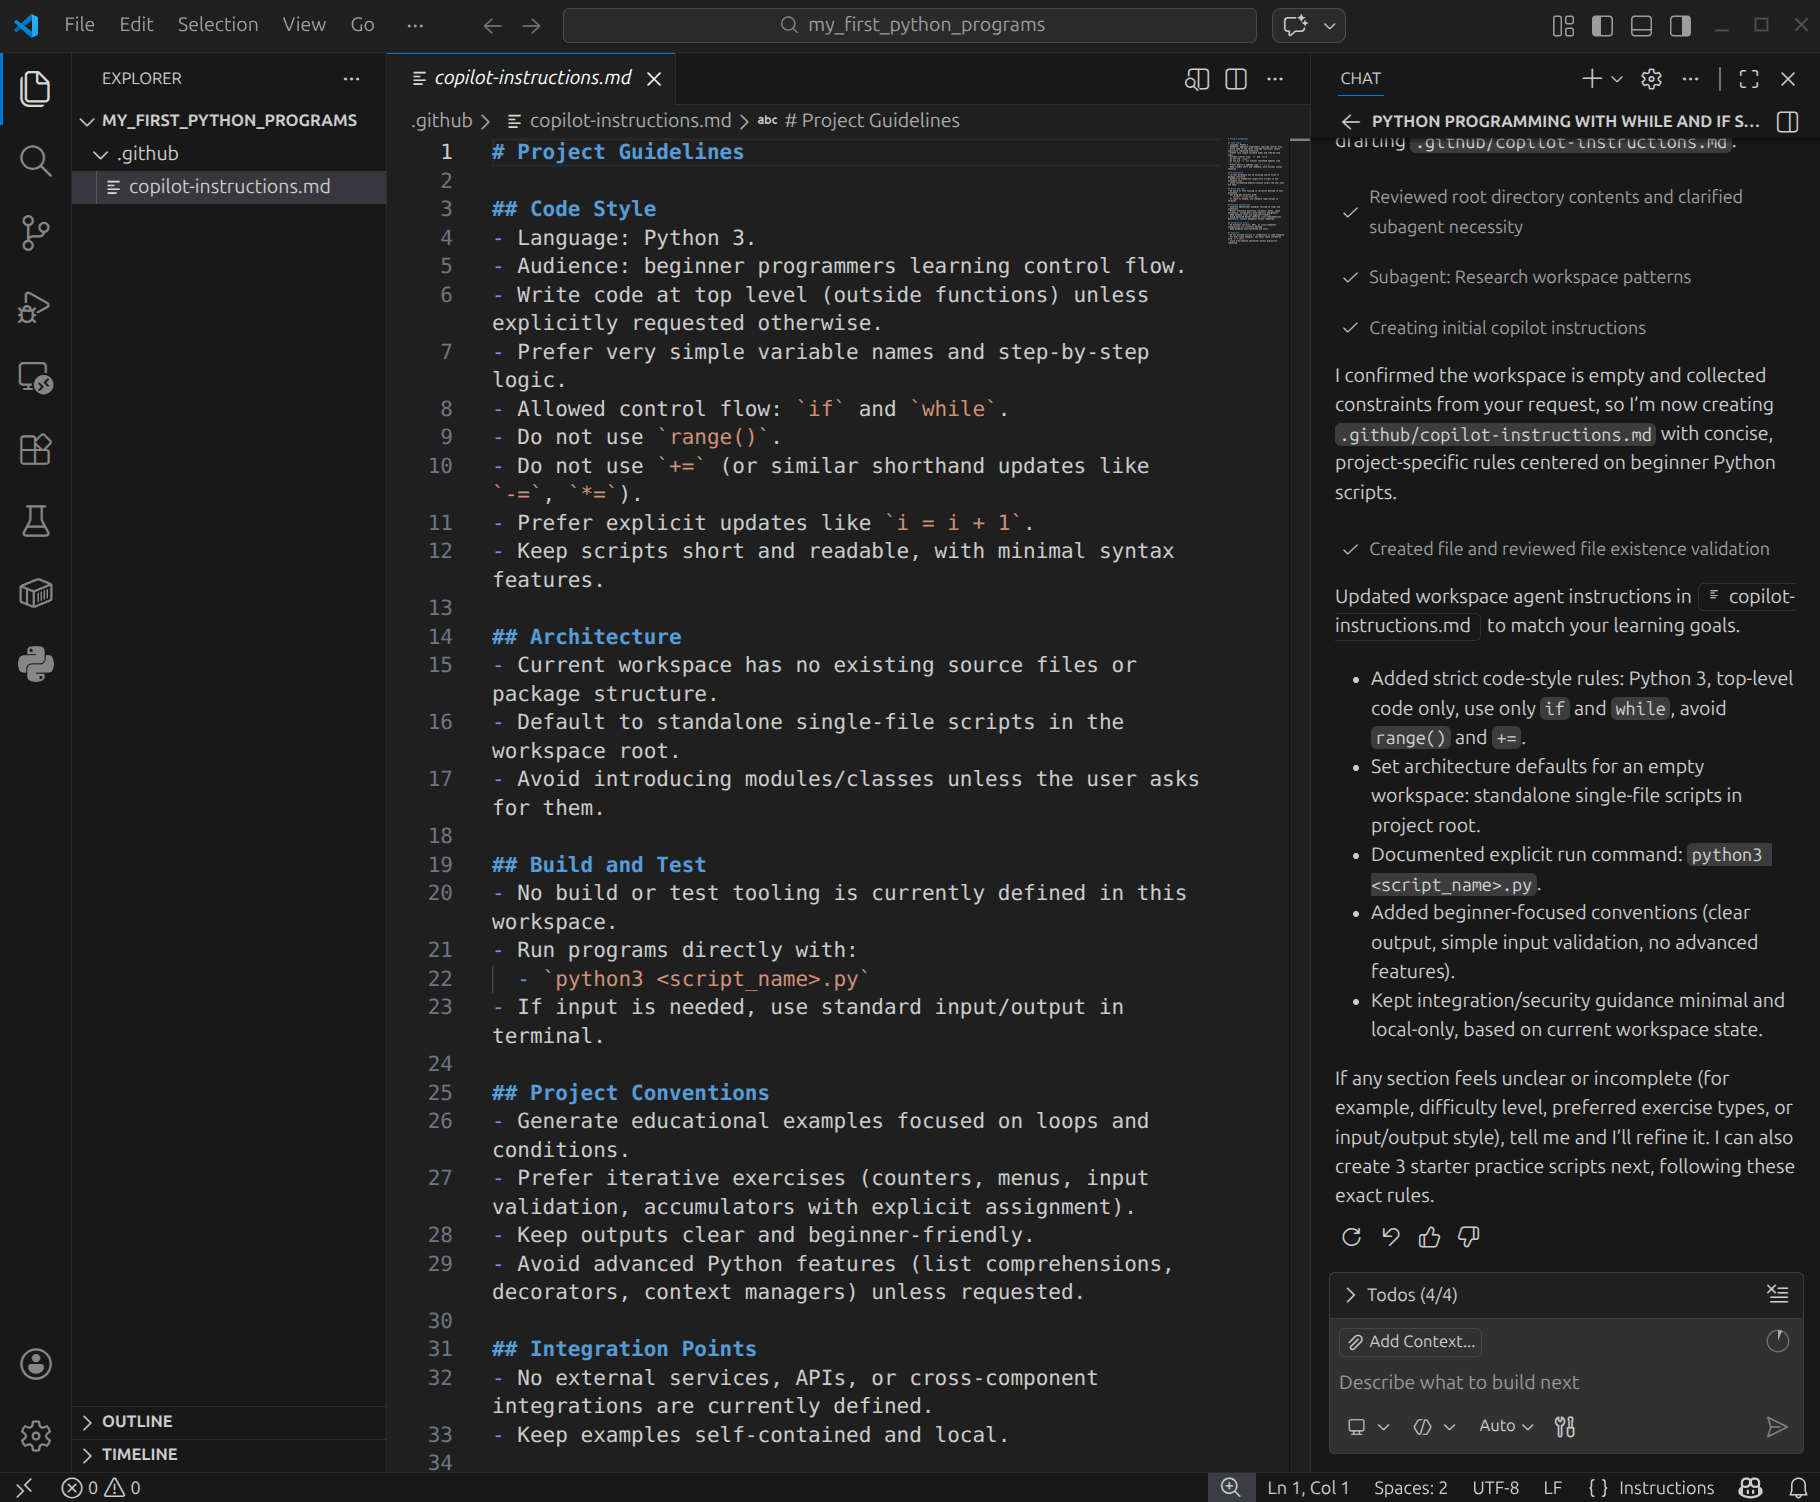
create a .github directory containing the copilot-instructions.md with that informationUsing the file explorer on the left, navigate to the file
copilot-instructions.md and open it to see the first draft
of the instructions that GitHub Copilot has created for you. You should
see something similar to the image below.
To see how GitHub Copilot uses these instructions, create a new file
called perfect_numbers.py in the
my_first_python_programs directory and type the following
comment line in it:
## write a Python program that asks the user to enter an integer number
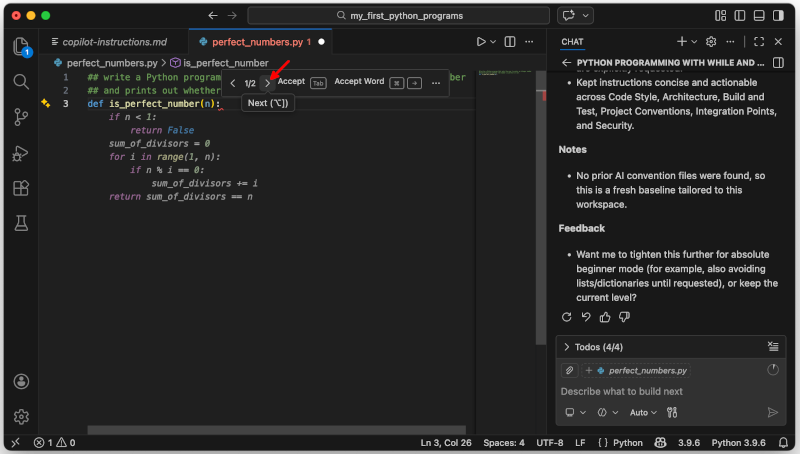
## and prints out whether the number is perfect or notAt the end of the second comment line that you have just typed,
Copilot may keep suggesting further instructions, disregard them and
press Enter to go to the next line. Then, you should see a
first line of code suggested by GitHub Copilot, press Tab
to accept the suggestion, and a multiple-line code chunk will be
suggested by GitHub Copilot, which may not be adapted to the context you
have given it. In this situation, hover the mouse over the suggested
code and you should see a popup window starting with
< 1/2 >, click on the right bracket >
to see the next suggestion, as shown in the image below.
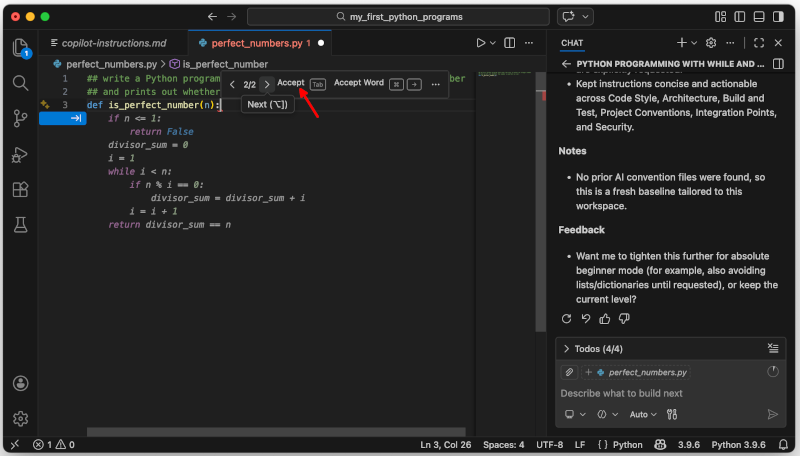
You should obtain a second chunk of suggested code, this time adapted
to the context specified in the Markdown file
copilot-instructions.md, using only while and if
statements, and without using the range() function or the
+= adding notation, as shown in the image below. Click on
the Accept button, or press the Tab key, to
accept this second suggestion.
If somehow, GitHub Copilot did not suggest a second code chunk
adapted to the context, then type in the Copilot chat window the
following prompt and press Enter:
you did not use the copilot-instructions.mdThis time, GitHub Copilot should suggest a code chunk adapted to the
context specified in the Markdown file
copilot-instructions.md.
You may find more comprehensive instructions on how to accept, reject or navigate through the suggestions from GitHub Copilot in VS Code in this link.
Exercise: Create a new file called
prime_numbers.py in the
my_first_python_programs directory and, using GitHub
Copilot, write a Python program that takes a number from the command
line and prints out whether the number is prime or not.
Exercise: Create a new file called
relatively_primes.py in the
my_first_python_programs directory and, using GitHub
Copilot, write a Python program that takes two numbers from the command
line and prints out whether they are relatively primes or not.
Using GitHub Copilot with R and RStudio
In this link you can find instructions on how to use GitHub Copilot with R and RStudio.