Practical 10
Last update: February 23rd, 2026
Objectives
The learning objectives for this practical are:
- Create R Markdown documents.
- Create R Markdown websites.
Setup and background
To do this practical you need an installation of R and RStudio. You
can find the instructions in the setup link on how
to install R and RStudio in your system. Make a directory called
practical10 for this practical.
R Markdown documents
Start RStudio and create a new R Markdown file by doing
File -> New File -> R Markdown ... with the default
option for output format (HTML). It is possible that the first time you
do this, RStudio will ask you to install some packages, if that is the
case, just click on the Install button and wait until the
installation process finishes.
A popup window will appear asking for a title, author and date, give
the text COVID19 Analysis as title, and write your name as
author. You will get a sample R Markdown file, save it
under the name index.Rmd in the practical10
directory you previously created, by using the menu option
File -> Save. Set the working
directory to the practical10 directory, where
you have saved this R Markdown document under the name
index.Rmd.
Now, we are going to process the index.Rmd file to
obtain its corresponding HTML output (index.html) by
pressing the knit button on top of the source code panel
(see image below with a red arrow pointing to that button).
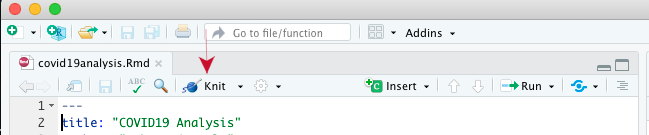
After processing the file, a popup window should appear displaying the HTML page of the R Markdown file.
Exercise: Modify this index.Rmd file to
contain some part of the analysis of the COVID19 data from practical 8. The final R Markdown document
should contain:
- Some text explaining what the R code does.
- At least one figure.
- At least one table with the numerical results.
Slides 19 to 23 from the lecture about
reproducibility contain a succint summary of R Markdown, but the
internet is plenty of materials to learn it. In particular, the website
https://rmarkdown.rstudio.com
contains well structured learning material and example, concretely, in
this link you
can find a more comprehensive description of the R Markdown language, in
the section Tables you can
find a way to pretty print the table with numerical results and in this
other link you
have a quick reference to the most commonly used R Markdown syntax. The
Help menu of RStudio also has links to many resources
including cheat
sheets for R Markdown.
The action performed by the knit button in RStudio can
be instructed from the R shell by typing the following:
> rmarkdown::render("filename.Rmd")where you should replace filename.Rmd
by the filename of the R Markdown document your are working on. The
previous instruction assumes you have set the working
directory of RStudio to the directory where the R Markdown file is
located.
Likewise, you can process the R Markdown document from the Unix shell command line with the following instruction:
$ Rscript -e "rmarkdown::render('filename.Rmd')"This is relevant if you want to automatize your analysis pipeline using a Makefile.
R Markdown websites
The rmarkdown package provides the possibility of building what the authors of that package call Markdown websites, which is web page displaying the contents of two or more R Markdown documents. To see how it works you need to follow the next steps:
Have a main R Markdown document stored under the filename
index.Rmd.Make a directory called
docswithin the directory where the R Markdown fileindex.Rmdis.In the same directory where the R Markdown file
index.Rmdis, create a Markdown file calledabout.mdwith the following contents:--- title: About this website --- This website was created by meIn the same directory where the R Markdown file
index.Rmdis, create a YAML text file called_site.ymlwith the following contents:name: "my-first-rmarkdown-website" output_dir: "docs" navbar: title: "My first R Markdown Website" left: - text: "Home" href: index.html - text: "About" href: about.html output: html_document:Having the working directory of RStudio pointing to the directory were you stored the previous files, type the following instruction in the R shell:
> rmarkdown::render_site()alternatively, you can also create the website from the Unix shell command line by going into that directory and typing:
$ Rscript -e "rmarkdown::render_site()"Open the file
docs/index.htmlin your web browser and you should see your first R Markdown website.
You may consult the help page of the function
render_site() from the rmarkdown package for
further details on available parameters and how it works. Essentially,
it looks up for the files _site.yml and
index.Rmd, and every other .Rmd,
.md or .html file, and process them to put
them together as a website in the directory docs (the name
of this directory can be changed through the keyword
output_dir in the _site.yml file, omitting
this keyword will result in creating the website in a directory called
_site).
Exercise: using the GitHub repo you created in practical
9 by accepting the GitHub Classroom assignment called My
Website, move your R Markdown documents and website to that repo
and try to see it displayed through the GitHub Pages private URL from
that GitHub repo. If you want to keep the contents you had in the
.html and .md files from practical 9, rename
them to some other names. If you have created the R Markdown document
with contents of the practical 8, it is likely that you have used the
two datasets called poblacio_municipis.csv and
dosis_municipi.csv. The latter is more than 100Mb large,
which means that GitHub will not allow you to upload it to your GitHub
repo when you attempt doing the git push command. To solve
this problem, you can either remove that file from outside the local
clone of the repo, or compress it by typing:
$ zip dosis_municipi.zip dosis_municipi.csvOnce you have sorted out this problem, you should be able to do the
git add, git commit and git push
commands without problems.